 Save to Pinterest
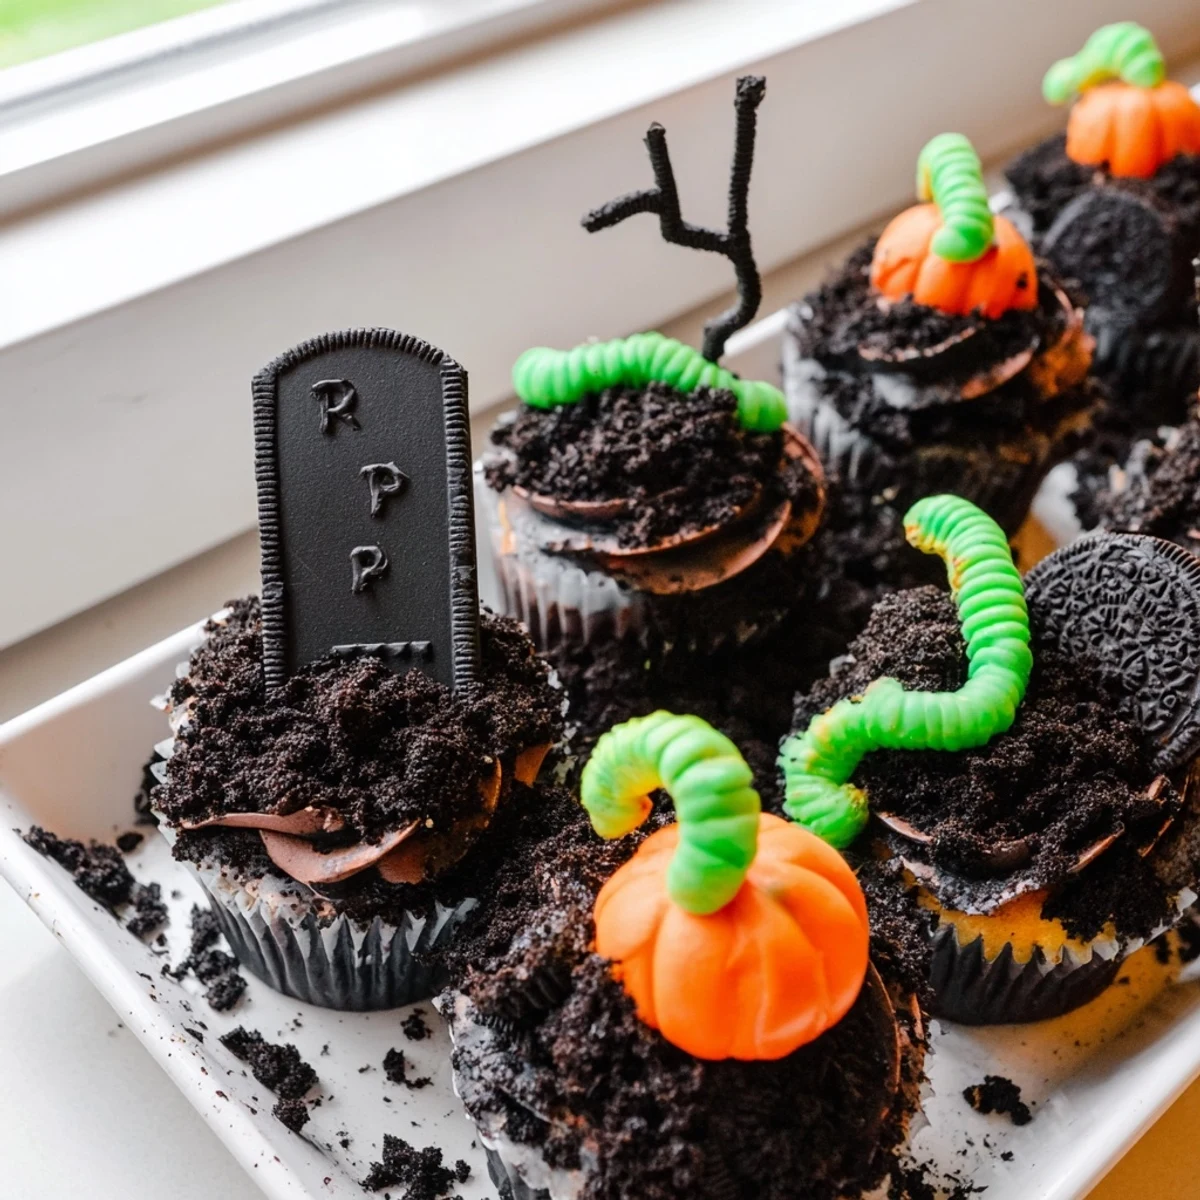
 Create these hauntingly delicious pull apart graveyard cupcakes for your next Halloween celebration. Moist chocolate cupcakes are topped with rich chocolate buttercream frosting, crushed chocolate cookie "dirt," and edible tombstone decorations made from rectangular cookies. The result is a creepy yet sweet centerpiece that will delight both kids and adults at any fall gathering.
The assembly process brings all the cupcakes together into one impressive graveyard scene, while the customizable decorations allow for creative personalization. From writing spooky messages on tombstones to adding gummy worms and candy pumpkins, each cupcake becomes a unique gravestone in your edible cemetery.
Ready in under an hour with simple ingredients, these festive treats are easier to make than they appear. The chocolate-forward flavor profile appeals to dessert lovers of all ages, making them ideal for school parties, office celebrations, or family Halloween nights.
Last Halloween my youngest accidentally called them graveyard cupcakes and the name stuck. We made them for her class party and suddenly every parent wanted the recipe. Now it is not Halloween until someone asks when I am making the graveyard cupcakes again.
I set up a decorating station at my daughters birthday party last October and the kids took over completely. Some made happy tombstones with smiley faces while others went full spooky with RIP and cobwebs. The parents stood around taking photos while chocolate frosting ended up on more faces than cupcakes.
Ingredients
- 1 ½ cups all-purpose flour: Spoon and level it gently for tender cupcakes that do not become dense
- 1 cup granulated sugar: Cream this thoroughly with butter for that light fluffy cupcake texture
- ½ cup unsalted butter softened: Room temperature butter blends smoothly without leaving lumps in your batter
- ½ cup whole milk: Adds moisture and richness though any milk works in a pinch
- 2 large eggs: Bring these to room temperature too so they incorporate evenly into the batter
- 2 tsp baking powder: Fresh baking powder gives you the best rise so check the expiration date
- 1 tsp vanilla extract: Pure vanilla makes a noticeable difference in the final flavor
- ¼ tsp salt: Just enough to balance the sweetness and enhance the chocolate flavor
- 1 cup unsalted butter softened: The base of your frosting so use good quality butter for the best taste
- 2 ½ cups powdered sugar: Sift this first to prevent any lumpy frosting surprises
- ½ cup unsweetened cocoa powder: Dutch process cocoa gives a deeper darker chocolate flavor
- 2-3 tbsp milk: Start with 2 tablespoons and only add more if your frosting seems too stiff
- 1 tsp vanilla extract: Rounds out the chocolate flavor beautifully
- Pinch of salt: A tiny pinch makes the chocolate taste more intense
- 6-8 chocolate sandwich cookies: Oreos work perfectly but any chocolate sandwich cookie creates great dirt
- 6-8 rectangular cookies or biscuits: Look for plain rectangular cookies that will hold the icing writing
- Black white and green gel icing pens: These work much better than regular frosting for detailed tombstone writing
- Gummy worms candy pumpkins or Halloween themed candies: Let your imagination run wild with the graveyard creatures
Instructions
- Preheat your oven to 350°F and line the muffin tin:
- The oven needs to be fully hot before your cupcakes go in for even baking. Use paper liners to prevent sticking and make cleanup easier later.
- Prepare the cupcake batter:
- Cream the butter and sugar until the mixture turns pale and fluffy which takes about 3 minutes. Beat in eggs one at a time then add vanilla before gently folding in the dry ingredients mixed with milk.
- Bake until perfectly done:
- Fill each liner only two thirds full to give them room to rise without overflowing. Check for doneness at 18 minutes by inserting a toothpick into the center of a cupcake.
- Make the chocolate frosting:
- Beat the butter until completely smooth then gradually add the powdered sugar and cocoa powder on low speed. Add the vanilla and milk last then whip until the frosting becomes silky and spreadable.
- Assemble the graveyard cake:
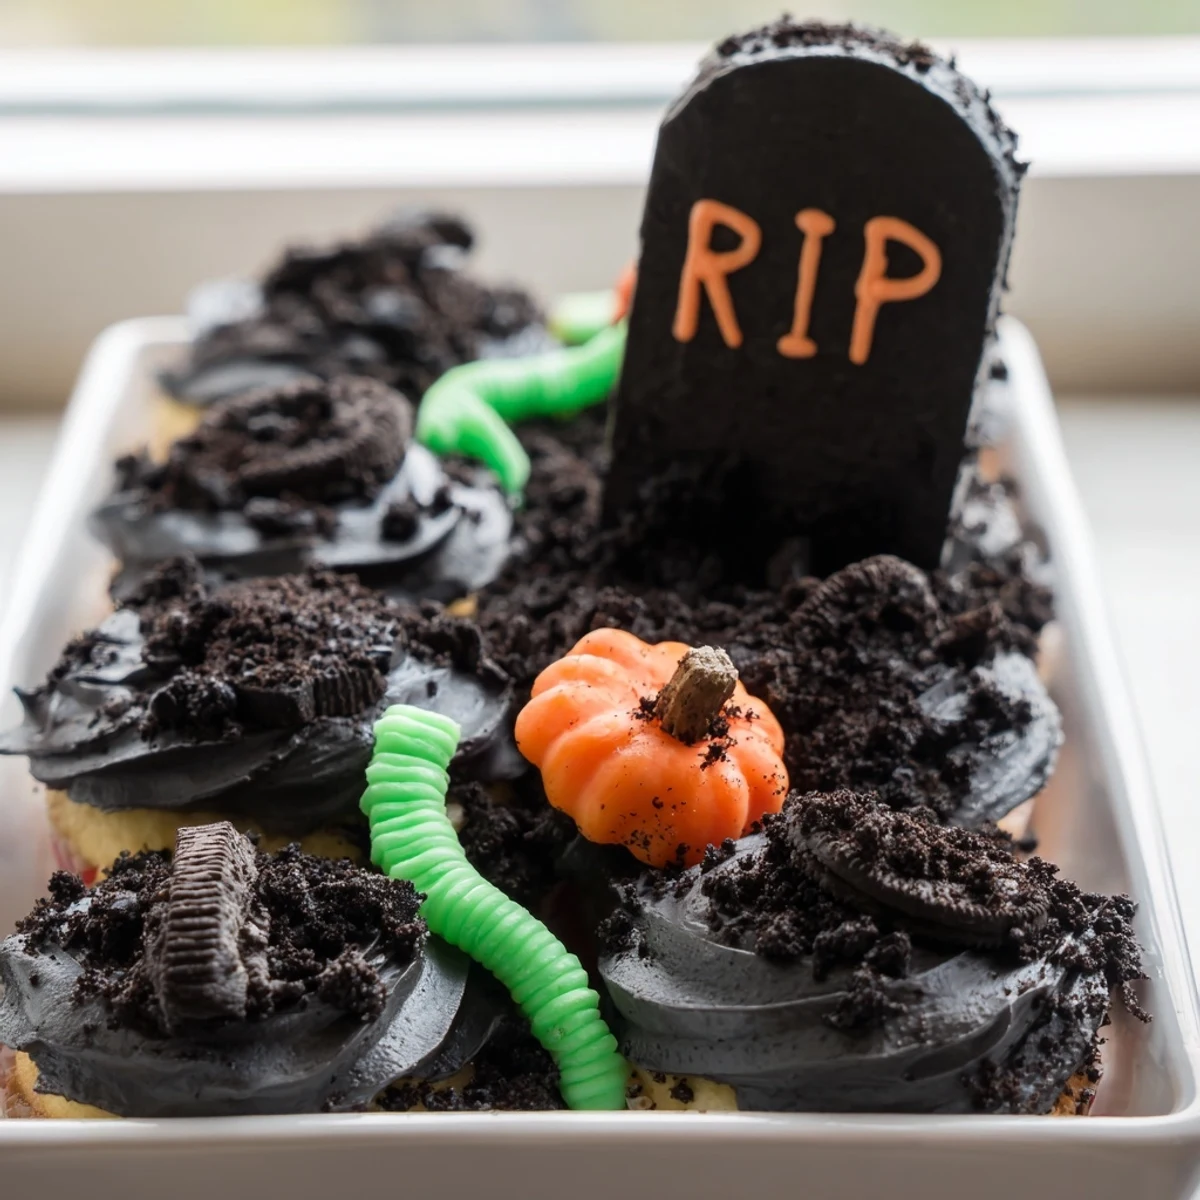
- Arrange the cooled cupcakes touching each other on your serving tray to create one solid surface. Frost them all together as if they were one large cake.
- Create the graveyard scene:
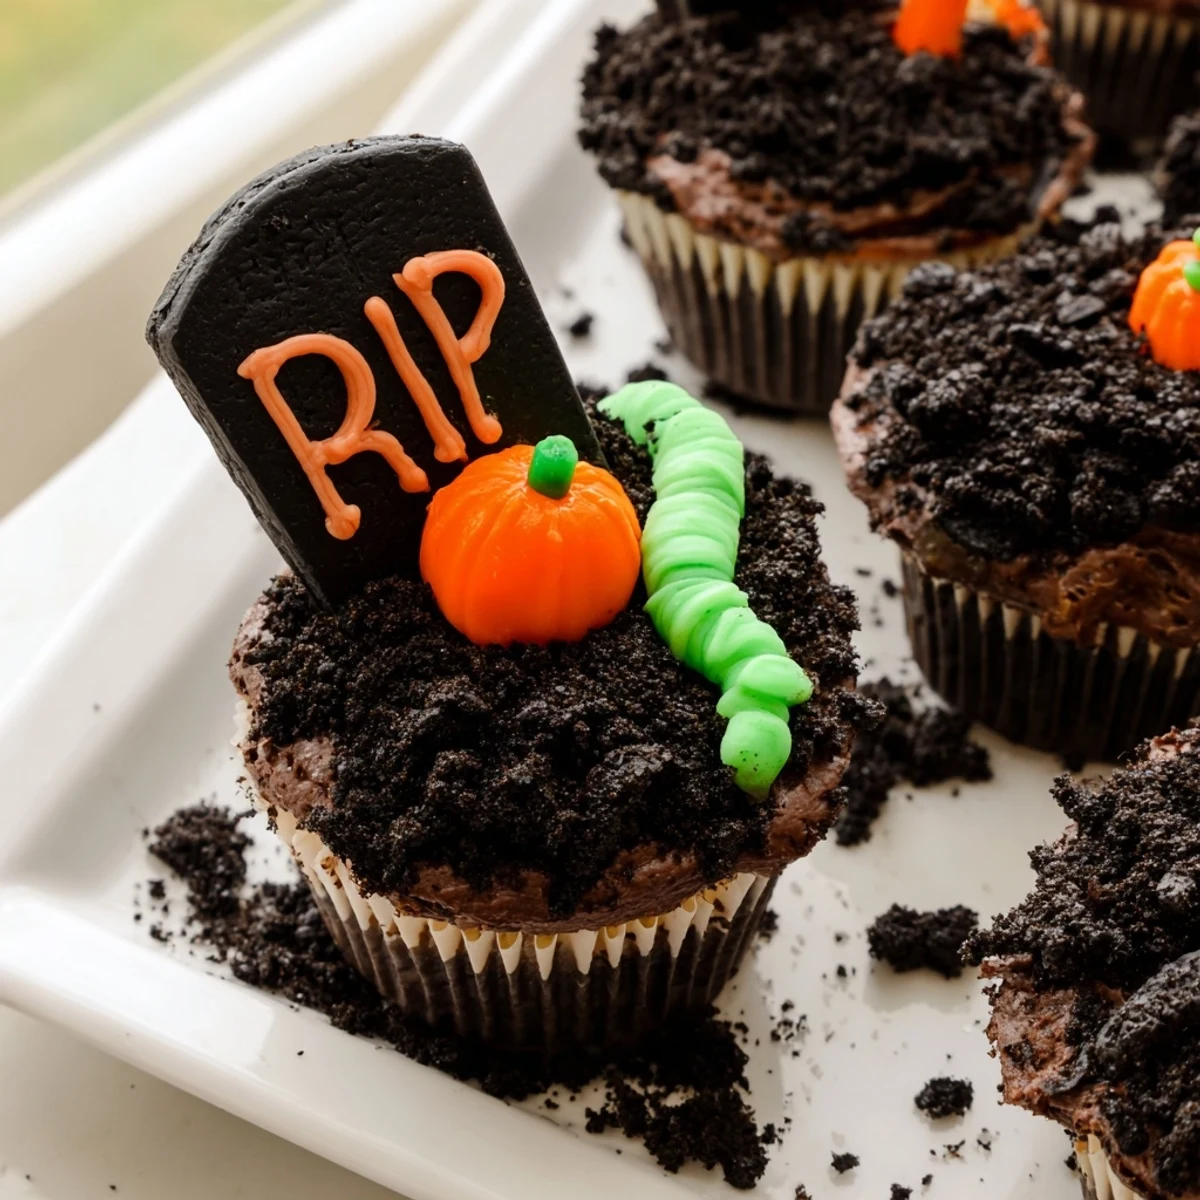
- Crush the chocolate cookies into small crumbs and sprinkle them generously over the frosted cupcakes. Write spooky messages or draw designs on the rectangular cookies then press them into the dirt at angles.
- Add final creepy touches:
- Tuck gummy worms halfway into the dirt so they look like they are emerging from the ground. Arrange candy pumpkins or other Halloween candies around the tombstones for the complete effect.
 Save to Pinterest
 My neighbor asked me to make these for her annual Halloween party three years running. Last year her teenage son who pretends to be too cool for everything helped me arrange the tombstones and then insisted on taking photos to show his friends. Sometimes the simplest desserts become the ones everyone remembers most.
Making Ahead
Bake the cupcakes up to two days before your event and store them in an airtight container. Make the frosting the day before but keep it at room temperature so it stays spreadable. Wait to crush the cookies until you are ready to serve or they might get soggy.
Decoration Ideas
Use crushed vanilla wafers mixed with a little cocoa powder for lighter colored dirt. Add candy bones or skeleton hands poking out from between tombstones. Arrange little candy ghosts made of marshmallows around the graveyard edges.
Serving Suggestions
Set up a small bowl of extra crushed cookies and let guests add their own dirt when serving. Keep some blank rectangular cookies and gel pens available for kids who want to create their own tombstones. Serve with warm apple cider for the perfect Halloween pairing.
- Use a large flat platter or cutting board for the most impressive graveyard presentation
- Have wet wipes nearby for sticky fingers after decorating
- Consider making double the recipe because these disappear faster than expected
 Save to Pinterest
 There is something delightfully spooky about breaking apart a graveyard dessert and seeing all the little tombstones tumble onto plates. Happy haunting and enjoy every chocolate crumb.
Your Recipe Questions
- → How far in advance can I make these Halloween cupcakes?
-
Bake the cupcakes up to two days ahead and store in an airtight container. Frost and decorate the graveyard scene the day of serving for best results. The cookie dirt and tombstone decorations can get soft if assembled too far in advance.
- → Can I use boxed cake mix instead of homemade cupcakes?
-
Absolutely. Use your favorite chocolate cake mix to save time. The graveyard decorations and frosting presentation will still create an impressive Halloween dessert that guests will love.
- → What cookies work best for the tombstone decorations?
-
Rectangular vanilla biscuits, shortbread cookies, or even Milano-style cookies work perfectly. Look for cookies that are sturdy enough to stand up when pressed into the frosting without breaking.
- → How do I transport pull apart cupcakes without ruining decorations?
-
Assemble the graveyard scene at your destination if possible. If transporting decorated cupcakes, use a flat tray with sides and place a lightweight cover over them. Drive carefully and keep the tray level.
- → Can I make these graveyard cupcakes gluten-free?
-
Yes. Substitute gluten-free all-purpose flour blend for regular flour in the cupcakes. Use gluten-free chocolate sandwich cookies and verify that your tombstone cookies are certified gluten-free.
- → What other Halloween decorations can I add?
-
Candy bones, skeleton hands, edible eyeballs, candy spiders, or pretzel sticks as fences work wonderfully. Orange and black sprinkles, edible glitter, or crushed Oreos for darker dirt are also fun additions.
