 Save to Pinterest
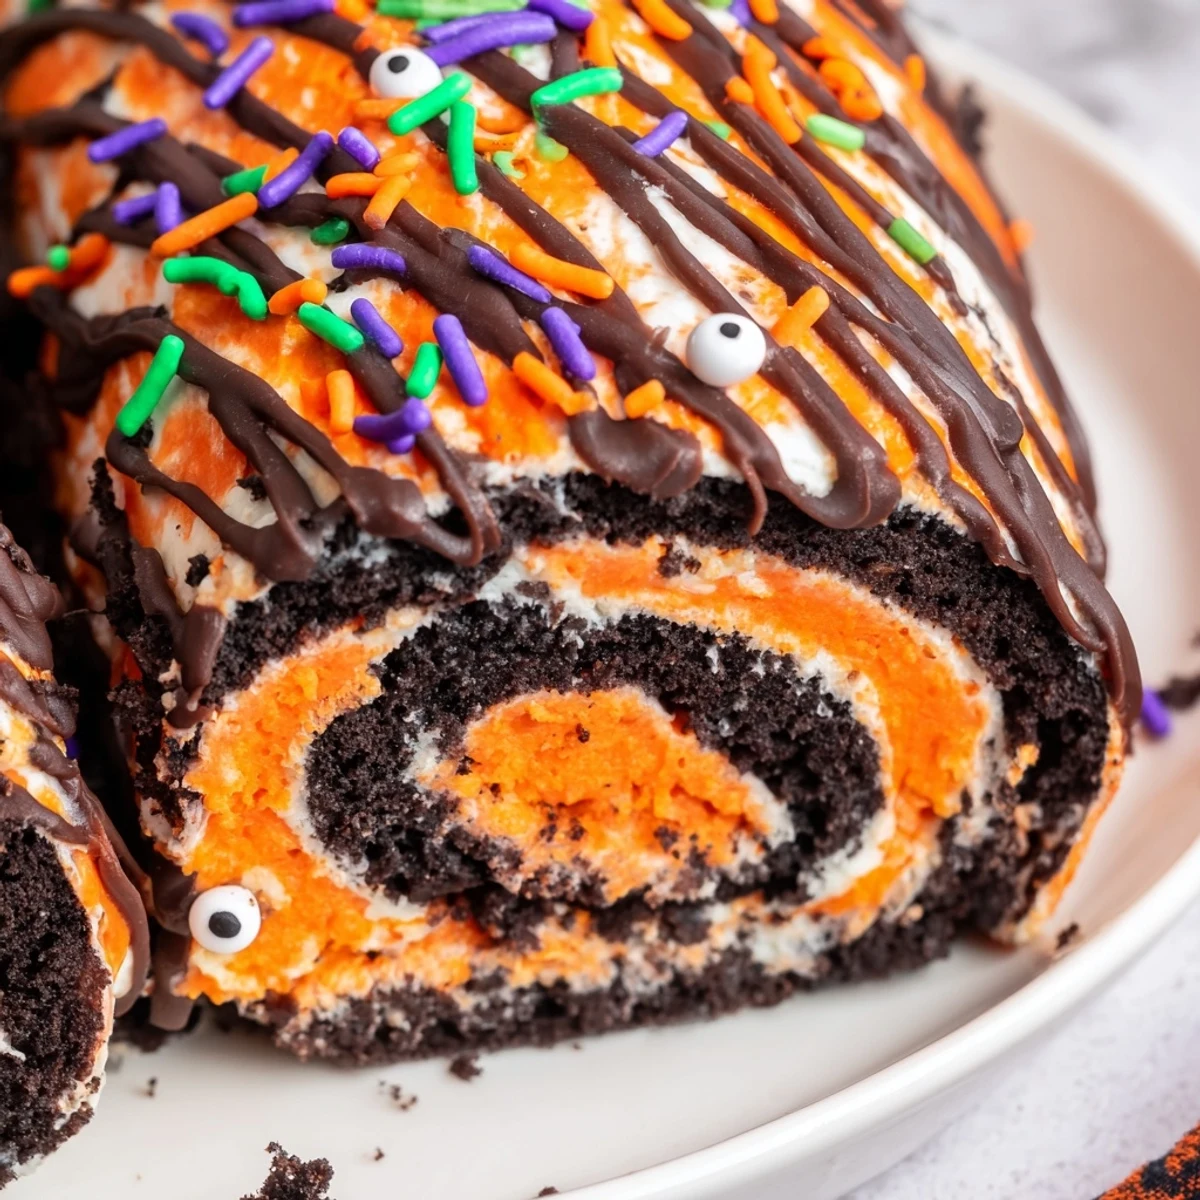
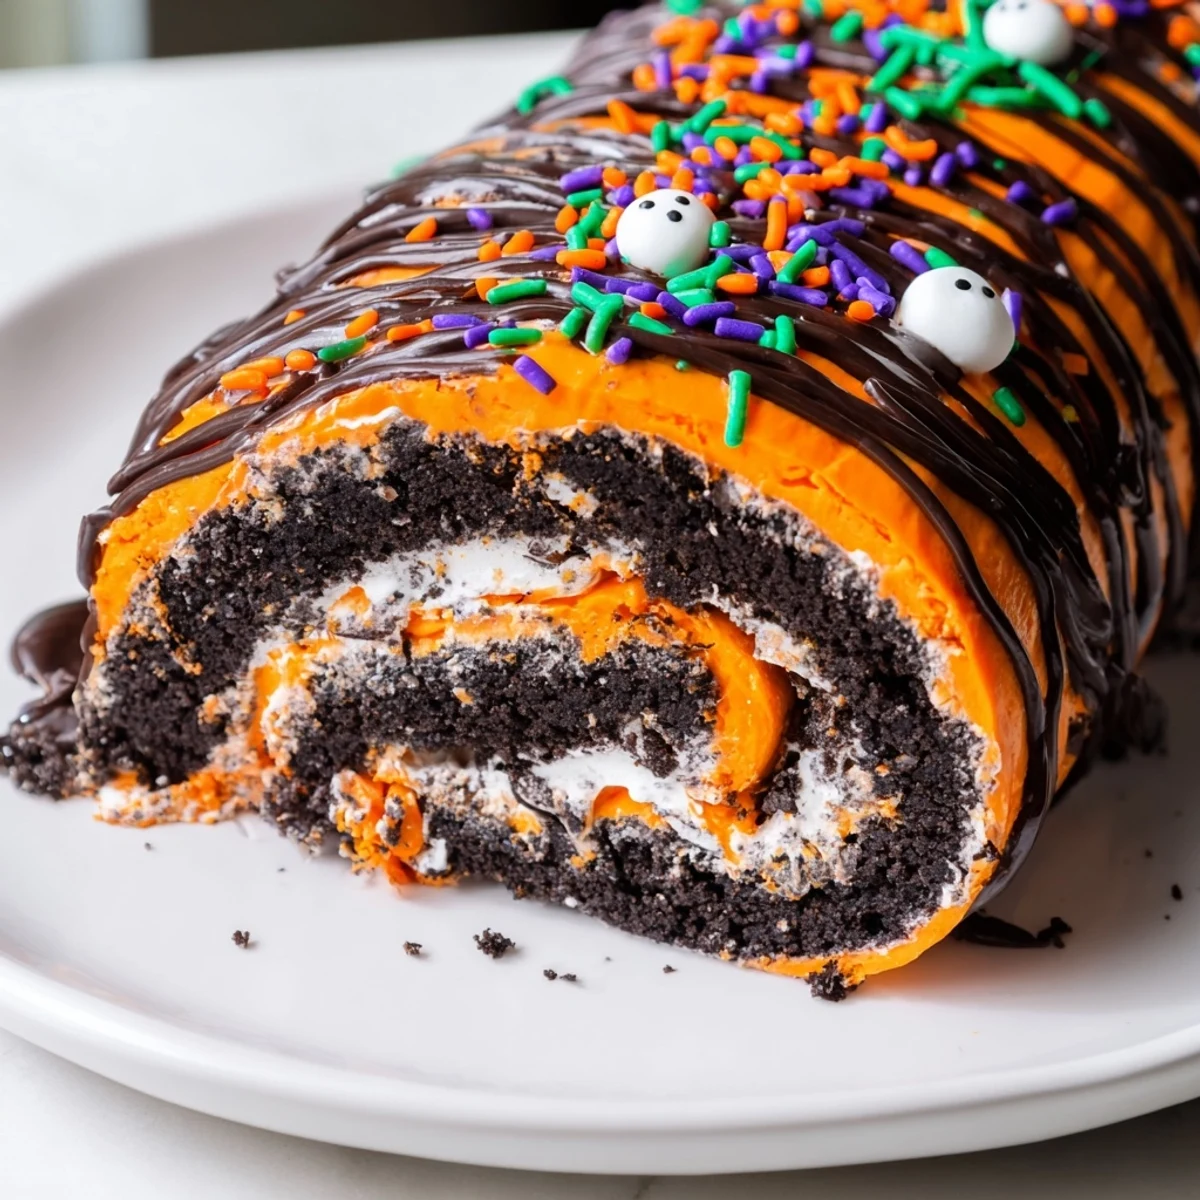
 Create a spooky showstopping dessert with this Halloween Oreo roll that requires absolutely no baking. Crushed Halloween Oreos form a rich, chocolatey base that gets rolled with colorful orange or purple whipped cream filling. The entire process takes just 25 minutes of active preparation before chilling to firm up. Decorate with sprinkles, candy eyes, and chocolate drizzle for maximum festive impact. Each slice delivers the perfect cookies-and-cream combination with a delightfully indulgent, creamy texture that's sure to be the hit of any Halloween gathering.
Last year my daughter decided October wasnt complete until everything in our kitchen turned either orange or purple. I laughed until she brought home a bag of Halloween Oreos and challenged me to make something nobody had seen before. That afternoon became a whirlwind of crushed cookies and food coloring experiments. This roll was the delicious result of her very specific aesthetic vision.
My neighbor came over during the first trial run and watched me roll the log like I was handling a sleeping snake. She promptly requested one for her own potluck and now brings sprinkles every time she visits. Something about this dessert turns adults into giddy kids again.
Ingredients
- Halloween Oreos: The cream filling in these already has orange coloring which makes the base extra festive. Regular Oreos work perfectly too with a splash of orange food gel.
- Powdered sugar: This sweetens the cookie base without adding grittiness. Sift it first if it has been sitting in your pantry for months.
- Unsalted butter melted: Melt it completely so it distributes evenly through the crushed cookies. Let it cool slightly so it doesnt start cooking the cream cheese.
- Cream cheese softened: Leave it on the counter for an hour. Cold cream cheese creates lumps that no amount of mixing can fix.
- Heavy whipping cream: Chill your bowl and beaters for ten minutes first. Room temperature cream refuses to whip no matter how long you beat it.
- Vanilla extract: Pure vanilla makes everything taste better but imitation works in a pinch.
- Food coloring: Gel coloring gives you vibrant orange without watering down the whipped cream. Start with a tiny amount and add more.
- Halloween sprinkles: The more chaotic and colorful the better. Let kids dump them on for maximum fun.
- Candy eyes: These turn the whole roll into a creepy cute monster. Place them right before serving so they dont get weird and weepy.
- Melted chocolate: White chocolate looks dramatic against the dark cookie base. Drizzle it thin so it doesnt overwhelm the other flavors.
Instructions
- Prep your workspace:
- Tear off a large sheet of parchment paper and lay it flat on your counter. This will be your rolling surface and the only thing standing between you and a sticky mess.
- Crush those cookies:
- Pulse the Oreos in a food processor until they resemble fine sand. You can also put them in a sealed bag and attack them with a rolling pin which is oddly satisfying.
- Make the cookie dough:
- Dump the crushed cookies into a bowl and add powdered sugar melted butter and softened cream cheese. Mix until everything comes together into a dark sticky dough that holds its shape when squeezed.
- Roll the base:
- Place the dough between two fresh sheets of parchment and roll it into a rectangle about half an inch thick. Lift the paper occasionally to keep it from sticking.
- Whip the cream:
- Beat the heavy cream with powdered sugar and vanilla until stiff peaks form. Gently fold in food coloring until it reaches your desired shade of Halloween orange or purple.
- Spread the filling:
- Pile the colored whipped cream onto the cookie base and spread it evenly. Leave a one inch border along one long edge so the filling doesnt squish out when you roll.
- Form the log:
- Use the parchment paper to lift the long edge and start rolling like a jelly roll. Go slowly and keep the tension even. Place the log seam side down on your parchment.
- Chill completely:
- Slide the roll onto a baking sheet and refrigerate for at least one hour. The chilling time is non negotiable or youll end up with a beautiful but unrollable mess.
- Decorate like crazy:
- Drizzle melted chocolate over the chilled log and immediately pile on sprinkles and candy eyes. Work quickly so the chocolate sets around the decorations.
- Slice and serve:
- Use a sharp knife and wipe it clean between cuts. Serve these cold and watch them disappear faster than you thought possible.
 Save to Pinterest
 My teenager who usually claims to be too cool for Halloween helped me place the candy eyes last year. She spent twenty minutes arranging them into winking faces and now this roll is the one thing she actually asks me to make. Food has a funny way of bringing everyone to the table.
Make It Your Own
Swap the Oreos for chocolate sandwich cookies with mint filling for a cool twist. The green cream inside creates a swirly effect that looks almost magical when sliced.
Party Perfect Timing
You can make the entire roll two days ahead and keep it wrapped tight in the refrigerator. Add the chocolate drizzle and sprinkles right before serving so they stay fresh and crunchy.
Serving Ideas
This slice looks stunning on a black plate or cake stand. The dark background makes the orange cream and sprinkles really pop.
- Pair with hot apple cider for the ultimate fall dessert experience
- Cut slightly thinner slices if you are serving this after a heavy meal
- Extra chocolate drizzle never hurt nobody
 Save to Pinterest
 Happy Halloween and may your sprinkles be plentiful and your chocolate perfectly melted.
Your Recipe Questions
- → Can I make this ahead of time?
-
Absolutely! The roll actually needs at least 1 hour to chill, making it perfect for preparing a day in advance. Store it well-covered in the refrigerator for up to 3 days before serving.
- → What if I can't find Halloween Oreos?
-
Regular Oreos work perfectly—just add orange or purple food coloring to the crushed cookie mixture along with the other base ingredients for that festive Halloween hue.
- → How do I get clean slices?
-
Use a sharp knife and wipe it clean between each slice. For even cleaner cuts, briefly dip the knife in hot water and dry it before slicing through the chilled roll.
- → Can I freeze this dessert?
-
Yes! Wrap the uncut roll tightly in plastic wrap and freeze for up to 1 month. Thaw in the refrigerator overnight before adding final decorations and slicing.
- → What's the best way to crush the Oreos?
-
A food processor creates the finest, most even crumbs in seconds. Alternatively, place cookies in a sealed bag and crush with a rolling pin, though this may leave some larger chunks for added texture.
- → How do I prevent the roll from cracking?
-
Don't roll the Oreo base too thin—aim for about 1/2 inch thickness. Also, ensure the filling isn't overly stiff, and roll gently but firmly using the parchment paper for support.
