 Save to Pinterest
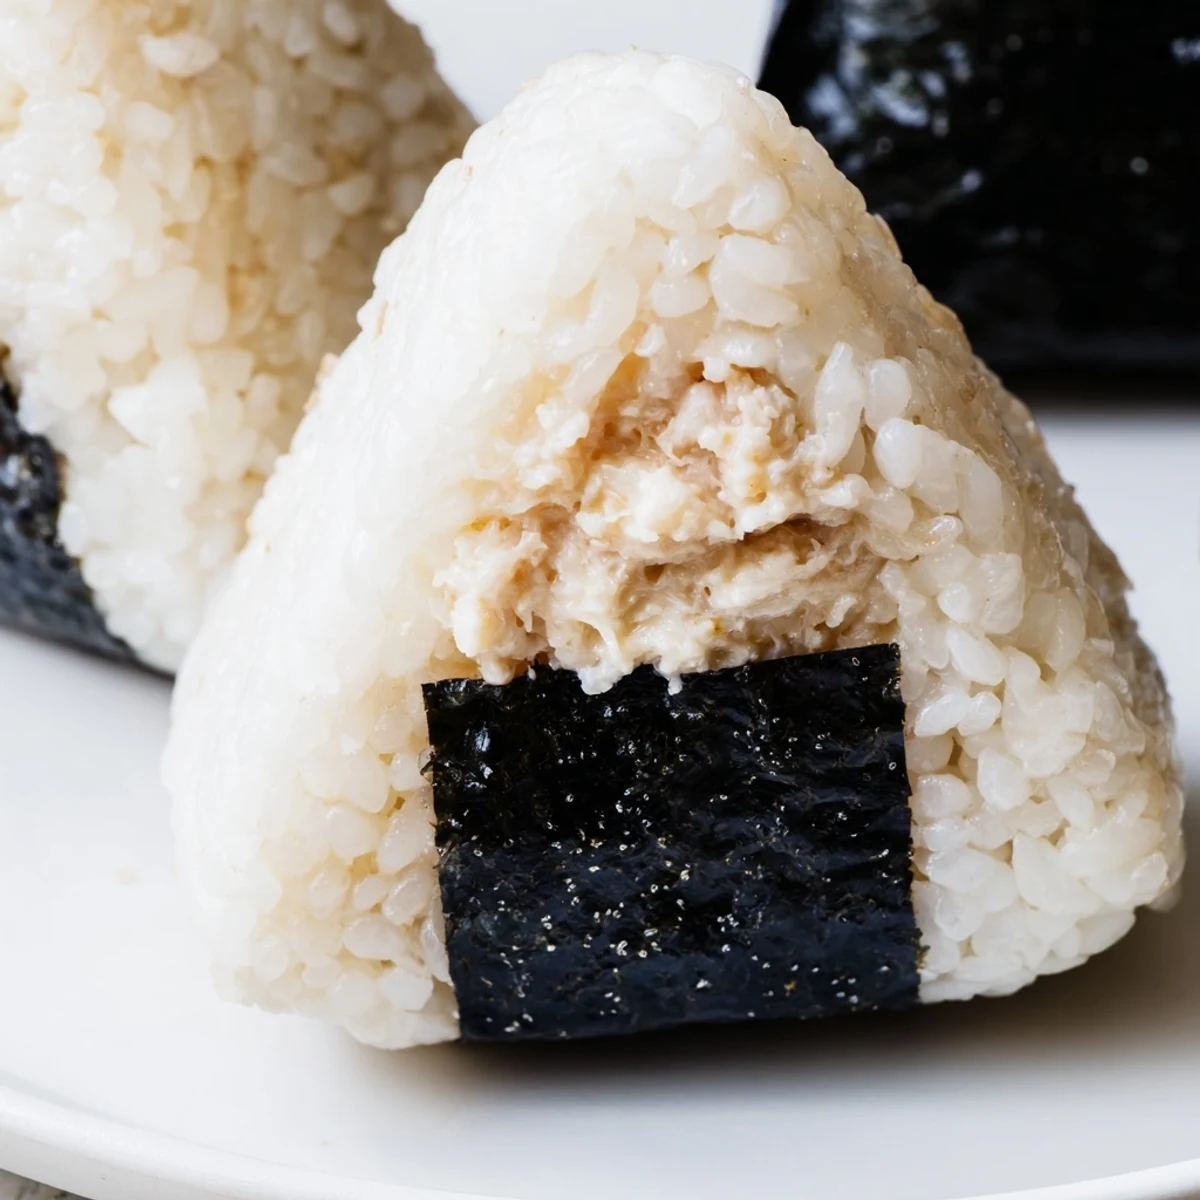
 Master the art of making authentic tuna mayo onigiri with this simple method. These beloved Japanese convenience store classics feature perfectly seasoned short-grain rice wrapped around a savory center of canned tuna mixed with creamy Japanese mayonnaise, soy sauce, and black pepper. The result is a portable handheld snack that's both satisfying and delicious.
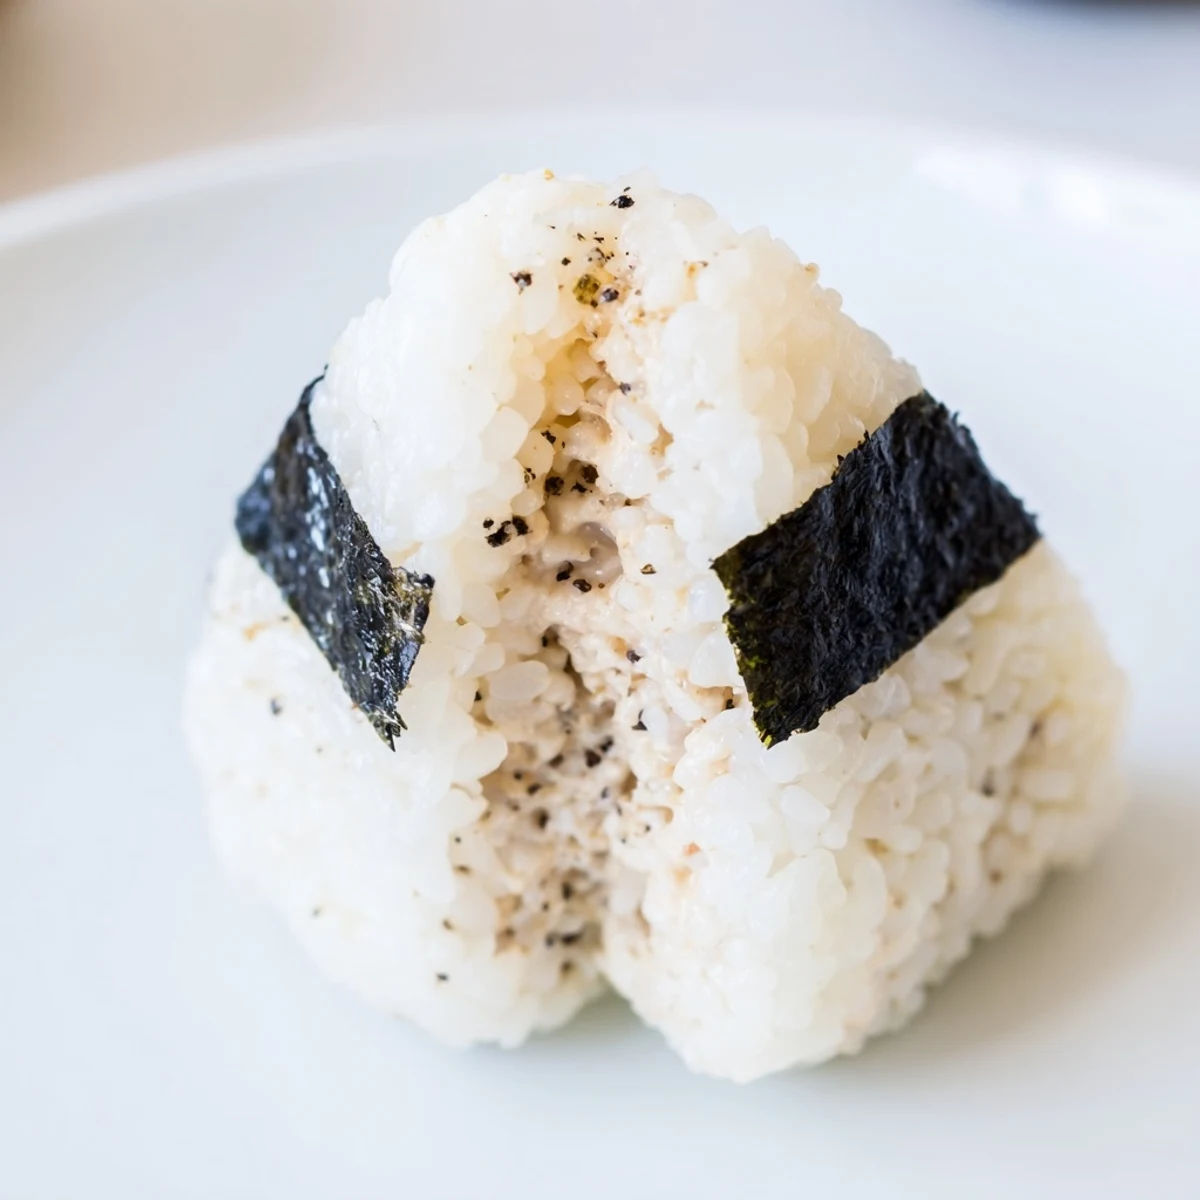
The key lies in using warm, properly cooked rice and wet, salted hands to shape the triangular forms without sticking. Each onigiri gets wrapped with a strip of crispy nori seaweed, adding texture and making them easy to hold. Customizable with additions like scallions or sesame oil, these versatile rice balls come together in just 35 minutes and yield six satisfying portions.
The convenience store around the corner from my old apartment in Tokyo had a shelf of onigiri that I visited more often than I care to admit, and the tuna mayo version always disappeared first, which is exactly why I started making them at home instead of racing the salarymen to the display case every morning.
My friend Yuki laughed at my first attempts because they looked more like lumpy potatoes than the sleek triangles sold in stores, but she ate three of them anyway and asked me to make more the following weekend.
Ingredients
- Japanese short grain rice: This is non negotiable because long grain varieties simply will not stick together when you try to shape them into balls.
- Tuna in water: Drain it thoroughly by pressing the lid down firmly, because excess water makes the filling soupy and weakens the rice structure.
- Japanese mayonnaise such as Kewpie: The egg yolks and rice vinegar in Kewpie create a tangier, creamier result than standard mayo, and this small swap changes everything.
- Soy sauce: Just a teaspoon adds depth and saltiness that ties the tuna to the rice perfectly.
- Salt: Used on your hands during shaping, this seasons the outside of each rice ball and creates a thin barrier against sticking.
- Nori strips: These add crunch and a briny hit of ocean flavor right as you bite in.
- Black pepper: Entirely optional but I always add it for a gentle warmth in the background.
Instructions
- Clean the rice:
- Rinse the rice under cold running water, swirling gently with your fingers, until the water turns from cloudy to nearly transparent, which usually takes four or five changes of water.
- Cook the rice:
- Combine the rinsed rice with water in a rice cooker or heavy bottomed pot and cook according to the package directions, then let it rest covered for ten minutes so the grains firm up slightly.
- Mix the filling:
- Flake the drained tuna into a bowl, add the mayonnaise, soy sauce, and pepper, then fold everything together until you have a thick, creamy mixture that holds its shape when scooped.
- Prep your hands:
- Wet both hands with plain water and rub a generous pinch of salt across your palms, feeling the grains dissolve slightly against your skin as you prepare to handle the warm rice.
- Shape the onigiri:
- Press about half a cup of rice into a flat disc on one palm, spoon a tablespoon of filling into the center, then cup your hands together and gently press and rotate until you form a triangle, making sure no filling peeks through the seams.
- Wrap with nori:
- Lay a strip of nori across the bottom third of each rice ball, glossy side facing inward, and press it lightly so it adheres to the warm rice before serving or packing.
 Save to Pinterest
 Packing these into a bento box for a spring picnic along the river felt like carrying a small piece of that Tokyo convenience store with me, except they tasted better because I could adjust the filling to be slightly more generous than the store ever was.
How to Store Them Without Ruining the Nori
If you are packing onigiri ahead of time, wrap the nori separately in plastic and let each person press it on themselves right before eating, because nothing is sadder than soggy seaweed clinging limply to cold rice.
What to Add When You Want More Flavor
Chopped scallions folded into the tuna mixture bring a fresh bite that cuts through the richness, and a few drops of sesame oil transform the filling into something that tastes almost indulgent.
Rice Cooker or Stovetop, Both Work Fine
A rice cooker is the easiest path to consistently fluffy grains, but a heavy pot with a tight lid on the lowest flame for fifteen minutes does the job beautifully if you stay nearby and listen for the gentle popping sounds.
- Let the cooked rice steam with the lid on for those extra ten minutes before opening, because impatience here leads to unevenly cooked centers.
- Keep a damp towel nearby to wipe your hands between shaping each ball, because sticky fingers make every onigiri harder to handle.
- Remember that practice matters more than perfection, and even ugly onigiri taste wonderful.
 Save to Pinterest
 There is something deeply satisfying about unwrapping a homemade onigiri at lunchtime, knowing you pressed each one into shape with your own salted palms.
Your Recipe Questions
- → What type of rice works best for onigiri?
-
Japanese short-grain rice is essential because its sticky texture helps the balls hold their shape. Long-grain varieties like jasmine or basmati won't bind together properly and will fall apart when handled.
- → Can I make these ahead of time?
-
Yes, onigiri can be wrapped tightly in plastic wrap and refrigerated for up to 24 hours. However, they're best enjoyed the same day when the rice texture is at its peak. The nori should be added just before eating to prevent sogginess.
- → What makes Japanese mayonnaise different?
-
Japanese mayonnaise like Kewpie has a richer, creamier texture and deeper umami flavor than Western varieties due to the use of egg yolks only and rice vinegar. Regular mayonnaise works as a substitute but will yield slightly different results.
- → How do I prevent the rice from sticking to my hands?
-
Wet your hands with water and rub a small amount of salt onto your palms before shaping each onigiri. The moisture creates a barrier while the salt seasons the exterior. You can also use plastic wrap as a barrier if needed.
- → Can I use other fillings besides tuna mayo?
-
Absolutely. Popular alternatives include salted salmon, pickled plum (umeboshi), cooked cod roe (tarako), grilled chicken, or vegetarian options like kombu seaweed and sesame seeds. The shaping method remains the same regardless of filling.
- → Why is my onigiri falling apart?
-
This usually happens when the rice isn't sticky enough or has cooled completely. Use warm rice, press firmly but gently when shaping, and ensure you're using proper short-grain rice. If the rice feels too dry, it may need slightly more water during cooking.
