 Save to Pinterest
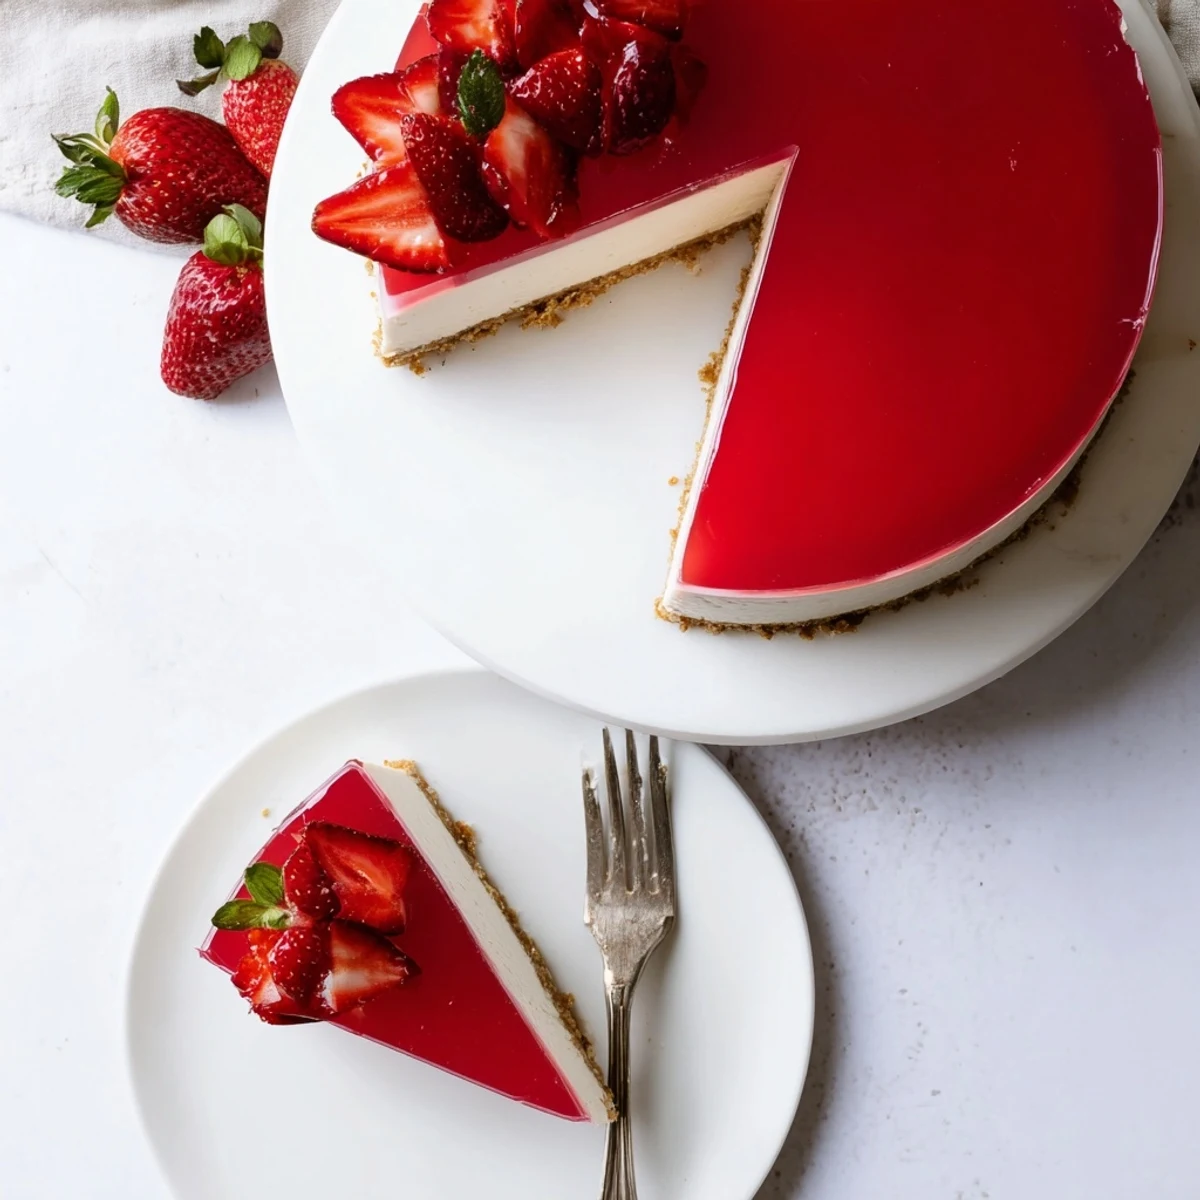
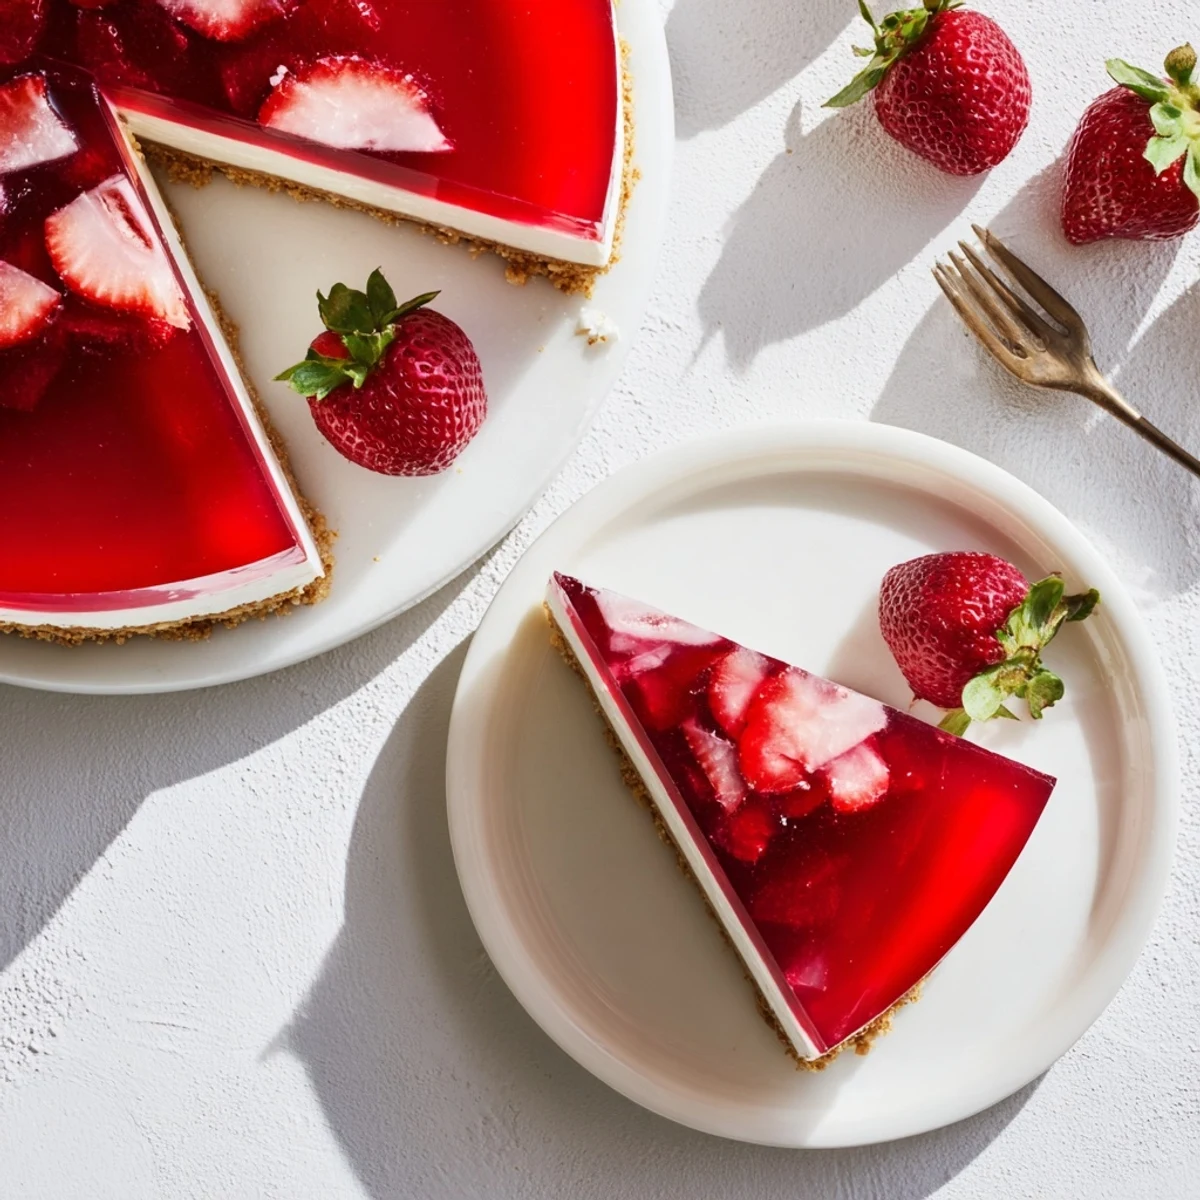
 This no-bake dessert combines creamy Greek yogurt and tangy cream cheese filling with a vibrant fruit-flavored jello topping, all resting on a buttery graham cracker crust. Perfect for warm weather entertaining, this chilled treat requires only 25 minutes of active preparation before setting in the refrigerator for 4 hours. The smooth, protein-rich filling balances sweetness with refreshing tang, while the colorful jello layer adds visual appeal and burst of fruit flavor.
The first time I made this no bake cheesecake was during a sweltering July afternoon when turning on the oven felt like punishment. My kitchen already felt like a sauna from the afternoon sun streaming through the windows, so the idea of a chilled, creamy dessert that required zero baking time became instantly appealing.
I brought this to a friend's backyard BBQ last summer and watched it disappear within minutes. Everyone kept asking what made it taste so light compared to regular cheesecake, and I loved explaining that the secret was simply swapping some cream cheese for Greek yogurt.
Ingredients
- Graham cracker crumbs: These create that classic buttery crunch we all know and love from childhood desserts. Press them firmly into the pan or they will crumble when you slice.
- Unsalted butter: Melted completely so it coats every crumb evenly. Salted butter works too but you might want to reduce the added sugar slightly.
- Greek yogurt: Plain, full fat or 2 percent works best here. The thick texture is essential and do not use vanilla flavored or it will overwhelm the delicate balance.
- Cream cheese: Must be completely softened to room temperature or you will end up with lumpy filling. I learned this the hard way after trying to rush the process once.
- Powdered gelatin: This little packet is what gives the cheesecake layer structure without baking. Sprinkle it gently over cold water and do not stir immediately or it will clump.
- Lemon juice: Fresh is always better but bottled works in a pinch. This bright acid cuts through the rich dairy and makes each taste feel lighter.
- Vanilla extract: Pure vanilla makes a noticeable difference here. The artificial stuff can leave a strange aftertaste in something so simple.
- Powdered sugar: Sift it first to avoid those tiny white lumps that never seem to dissolve completely no matter how long you mix.
- Fruit flavored gelatin: Strawberry, raspberry or lemon work beautifully. Choose something that complements fresh fruit if you plan to garnish.
Instructions
- Prep your pan:
- Line a 9 inch springform pan with parchment paper on the bottom. This makes removing the cheesecake so much easier later and prevents sticking.
- Make the crust:
- Mix graham cracker crumbs with melted butter and sugar until it feels like wet sand. Press it firmly into the bottom of your pan using the back of a measuring cup. Chill while you work on the filling.
- Bloom the gelatin:
- Sprinkle powdered gelatin over 3 tbsp cold water in a small bowl. Let it sit undisturbed for 5 minutes until it absorbs the water and looks like translucent sheets.
- Beat the filling:
- Cream the softened cream cheese until completely smooth. Add Greek yogurt, powdered sugar, vanilla and lemon juice then beat until everything is incorporated and silky.
- Melt and mix:
- Microwave the bloomed gelatin for 15 seconds until completely dissolved. Let it cool slightly then whisk it into your cheesecake mixture quickly before it starts setting.
- Set the base:
- Pour the filling over your chilled crust and smooth the top with a spatula. Refrigerate for 2 hours until it feels firm to the touch.
- Make the jello:
- Dissolve fruit flavored gelatin in 1 cup boiling water then add 1/2 cup cold water. Let it cool to room temperature but do not let it start setting.
- Add the topping:
- Gently pour the cooled jello over your set cheesecake layer. Refrigerate at least 2 more hours until the jello is completely firm and wobbles as one unit.
- Release and serve:
- Run a thin knife around the edge before unlatching the springform. Garnish with fresh berries if desired and slice while cold.
 Save to Pinterest
 This recipe has become my go to for summer potlucks because it travels so well and never fails to impress. There is something magical about cutting into those distinct layers and hearing that satisfying crack of the crust.
Making It Ahead
The entire cheesecake can be made up to 2 days in advance and kept covered in the refrigerator. The flavors actually develop and meld together beautifully overnight, making it even more delicious the next day.
Flavor Variations
Swap the Greek yogurt for a flavored version like honey or strawberry to add another dimension. Just remember that flavored yogurts often contain added sugar so you may want to reduce the powdered sugar accordingly.
Serving Suggestions
This cheesecake is rich enough to stand alone but pairs beautifully with fresh seasonal berries. A dollop of lightly sweetened whipped cream on the side never hurt anyone either.
- Let the cheesecake sit at room temperature for 10 minutes before serving for the creamiest texture
- Use a sharp knife dipped in hot water and wiped clean between each slice for perfect presentation
- Garnish right before serving so the berries do not release water onto the jello layer
 Save to Pinterest
 There is something deeply satisfying about serving a dessert that looks this impressive but required absolutely no oven time. Hope it becomes your summer standby too.
Your Recipe Questions
- → Can I make this gluten-free?
-
Yes, simply substitute regular graham crackers with certified gluten-free graham cracker crumbs for the crust. Ensure all other ingredients, particularly the gelatin, are labeled gluten-free.
- → How long does this cheesecake need to chill?
-
The complete dessert requires 4 hours of chilling time—2 hours for the cheesecake layer to set, then 2 additional hours after adding the jello topping. For best results, make it the night before serving.
- → Can I use different gelatin flavors?
-
Absolutely! Strawberry, raspberry, lemon, orange, or peach gelatin all work beautifully. Choose flavors that complement fresh fruit garnishes or match your seasonal preferences.
- → Is this suitable for vegetarians?
-
This dessert contains gelatin, which is not suitable for vegetarians. To make it vegetarian-friendly, substitute both the powdered gelatin and fruit gelatin with agar-agar or vegetarian gelatin alternatives.
- → Can I freeze this cheesecake?
-
Freezing is not recommended as the jello layer becomes watery and loses texture upon thawing. The cheesecake layer alone can be frozen for up to 1 month, but it's best enjoyed fresh from the refrigerator within 3-4 days.
- → What other crust options can I use?
-
Beyond graham crackers, try vanilla wafer cookies, digestive biscuits, or shortbread cookies. For a lighter version, use crushed cornflakes mixed with a bit more sugar and butter.
