 Save to Pinterest
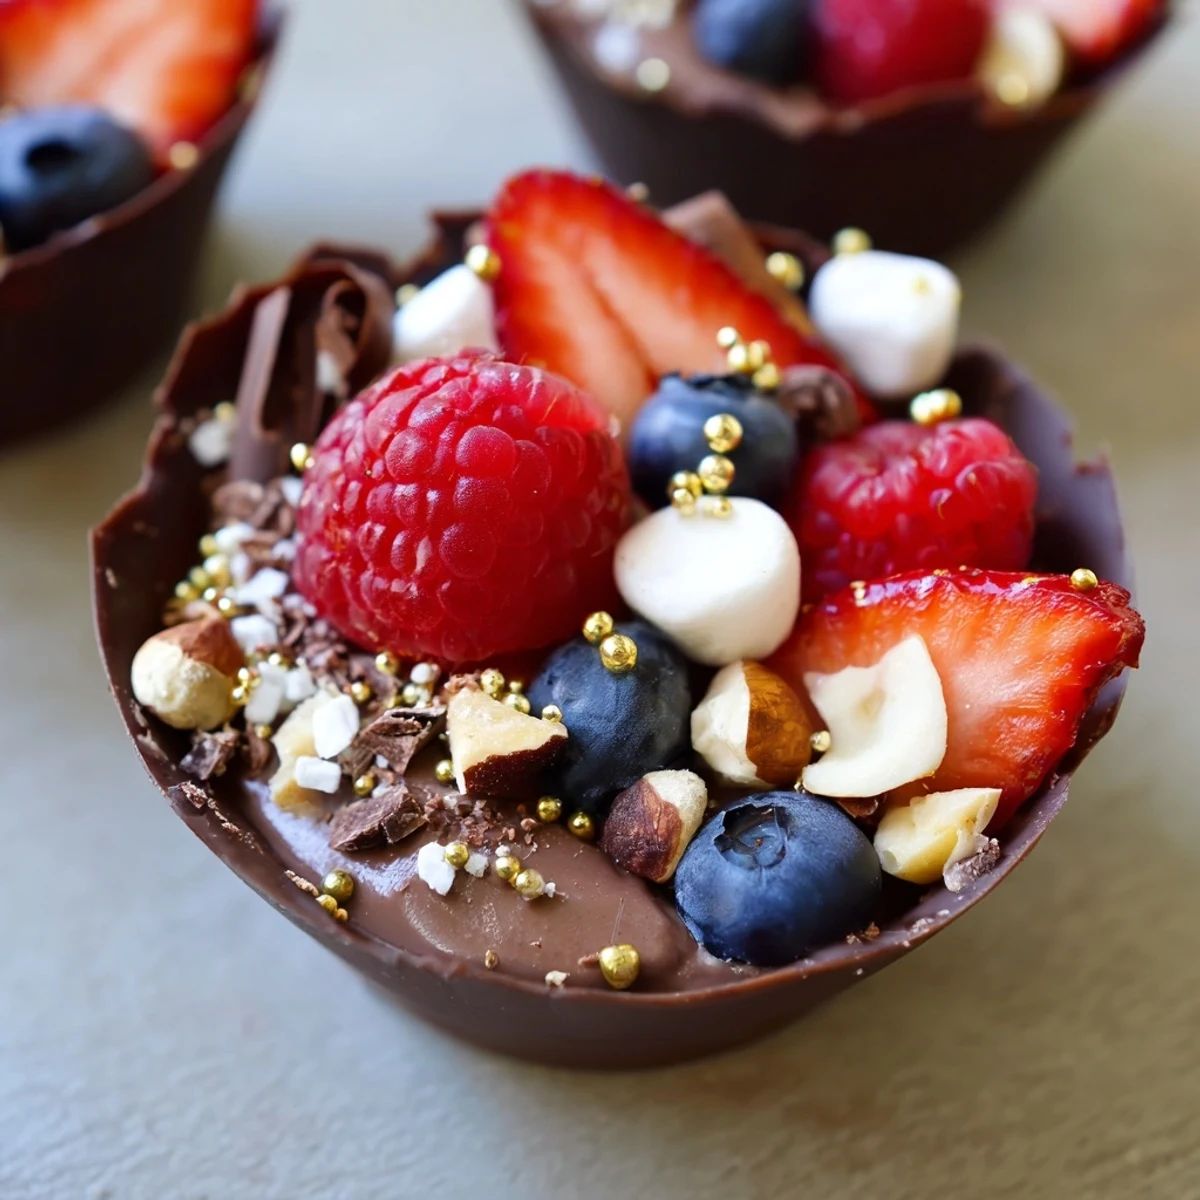
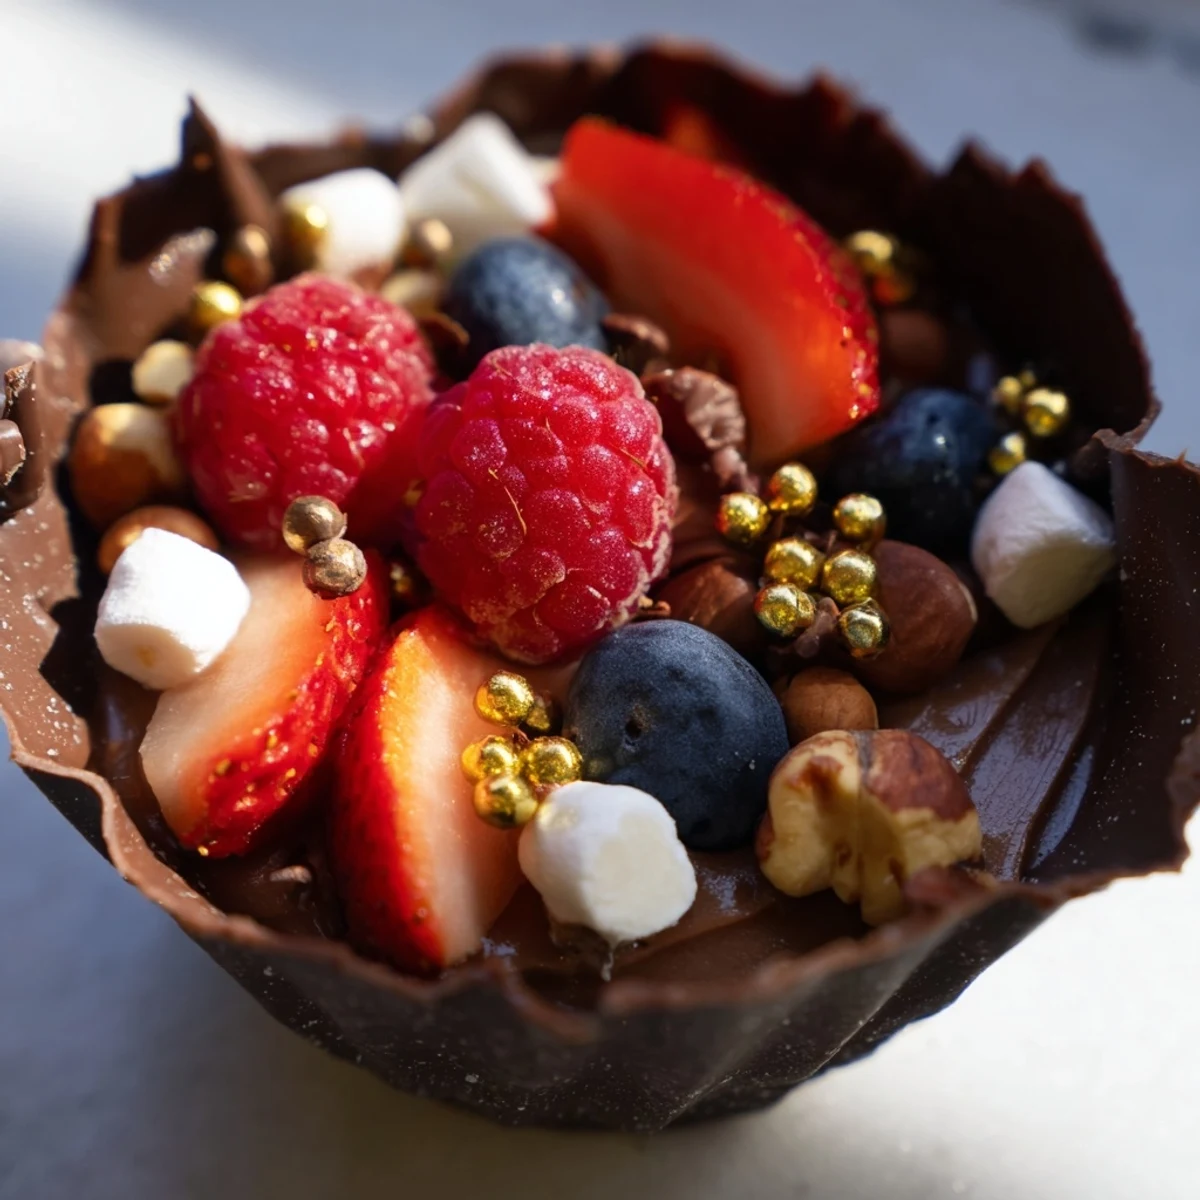
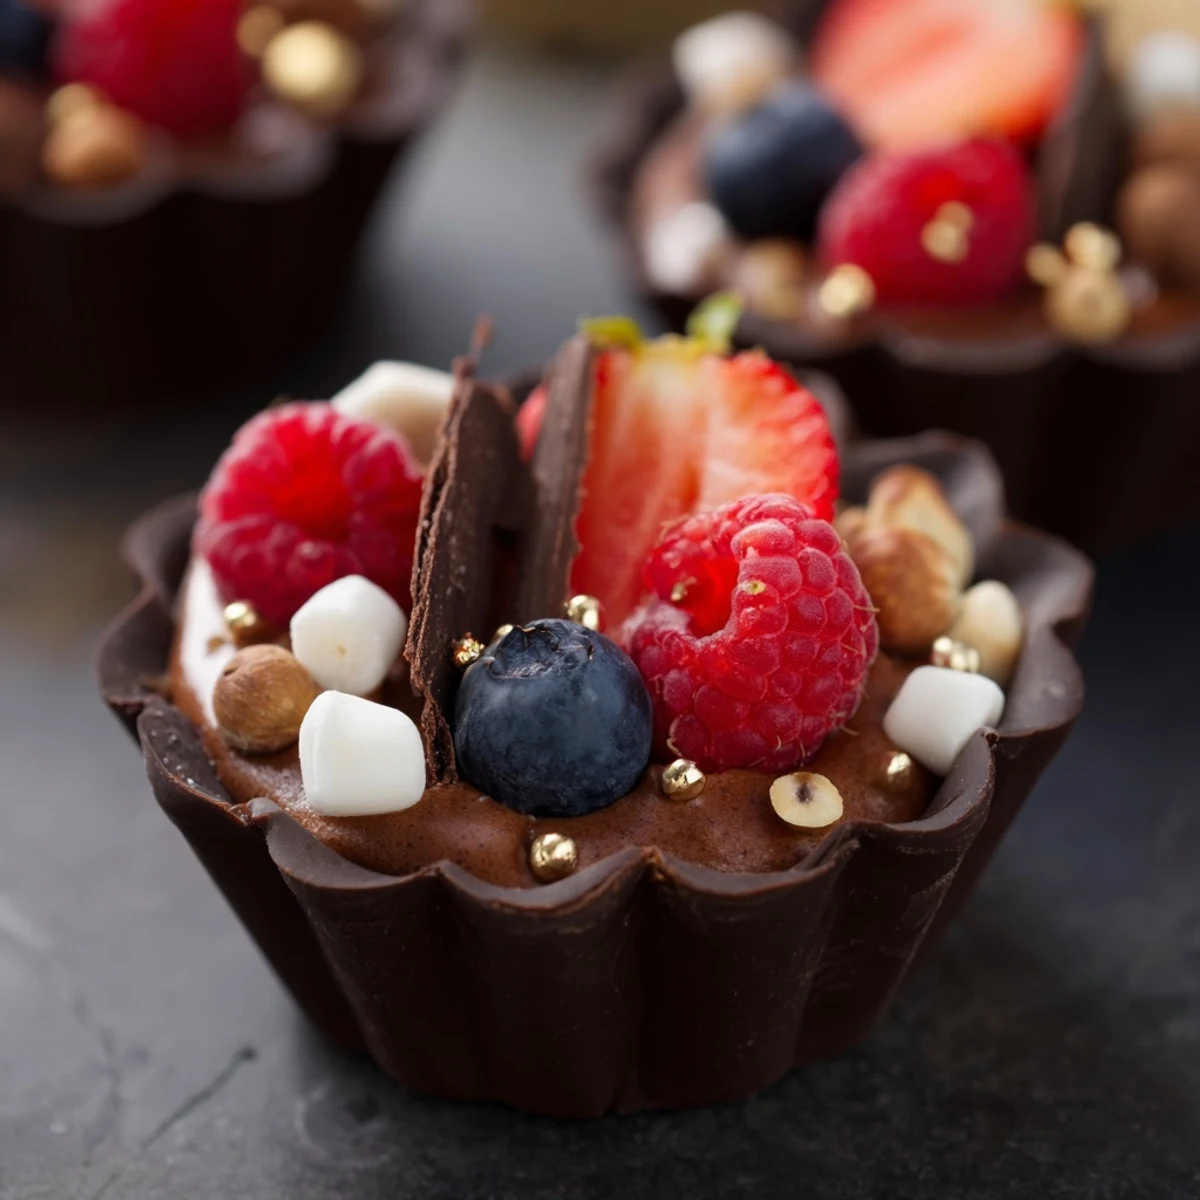
 Create stunning individual chocolate cups filled with silky dark chocolate mousse and adorned with fresh mixed berries, crunchy nuts, and decadent toppings. These impressive handheld desserts feature homemade chocolate shells crafted from melted dark chocolate, filled with a whipped cream-based mousse that balances sweetness with intense cocoa flavor. The interactive grazing-style presentation lets guests enjoy multiple textures and flavors in each bite, from smooth mousse to juicy berries to crisp nuts. Ideal for entertaining, these elegant cups can be prepared ahead and chilled until ready to serve.
The first time I made these, my sister walked into the kitchen and actually gasped. She thought I had spent hours at a fancy pastry shop, but really I had just discovered the magic of painting chocolate into cupcake liners. Now they are my go to when I want to make people feel special without the stress of a complicated dessert.
I served these at my book club last spring, and we spent more time taking photos of the cups than actually eating them. The combination of crisp chocolate shell, creamy mousse, and fresh berries is just impossible to resist. One friend admitted she ate two before anyone else arrived.
Ingredients
- Dark Chocolate: The higher the cocoa percentage, the more intense the flavor. I have found 60 to 70 percent is the sweet spot for these cups.
- Heavy Cream: Very cold cream whips up faster and holds its shape better. Pop your bowl in the freezer for ten minutes before whipping.
- Fresh Berries: Use whatever looks best at the market. Strawberries add sweetness, raspberries bring tartness, and blueberries offer pops of color.
- Chopped Nuts: Toast them lightly in a dry pan for two minutes to bring out their natural oils and deepen the flavor.
Instructions
- Craft the Chocolate Cups:
- Melt your chocolate in short bursts, stirring every twenty seconds so it does not seize. Working carefully, paint the melted chocolate inside your liners with upward strokes to create nice even edges. Chill until completely firm, which usually takes about twenty minutes.
- Whip Up the Mousse:
- Melt the chocolate for the mousse and let it cool until just slightly warm. Whip your cream with sugar and vanilla until soft peaks form, then fold in the chocolate gently so you keep all that air you just whipped in.
- Assemble Your Cups:
- Fill each chocolate cup about two thirds full with the mousse, using a small spoon or piping bag for neatness. Pile on your toppings however you like, making each cup unique and beautiful.
 Save to Pinterest
 My daughter requested these for her birthday instead of cake. She stood at the counter arranging berries and gold leaf on each cup like tiny edible works of art. Seeing her face light up when she served them to her friends made all the chocolate stained fingers worth it.
Make Ahead Magic
You can prepare the chocolate cups and mousse separately up to two days in advance. Store the cups in an airtight container with parchment paper between layers. Whip the mousse fresh the day you plan to serve them for the lightest texture.
Flavor Twists
Swap half the dark chocolate for milk chocolate in the mousse if you are serving anyone who prefers sweeter desserts. A teaspoon of instant espresso powder melted into the chocolate creates a mocha version that coffee lovers adore. For something completely different, try white chocolate cups with a raspberry mousse inside.
Presentation Ideas
Arrange your cups on a vintage cake stand or wooden board for grazing style service. Small signs naming each topping variety make them feel even more special. Consider serving them with tiny forks or small dessert spoons for easier eating.
- Place each cup on a doily or small napkin
- Have extra toppings on the side for guests to customize
- Keep them chilled until the very last minute
 Save to Pinterest
 These little cups have become my signature dessert for dinner parties and holiday gatherings. There is something so joyful about handing someone their own personal chocolate creation and watching their eyes light up before they even take a bite.
Your Recipe Questions
- → How far in advance can these be made?
-
Prepare chocolate cups and mousse up to 24 hours ahead. Assemble and garnish within 4-6 hours of serving for optimal texture and fresh appearance.
- → Can I use milk or white chocolate instead?
-
Absolutely. Substitute milk or white chocolate for either the cups, mousse, or both. White chocolate creates beautiful contrast and pairs exceptionally well with berries.
- → What alternatives work for the cup molds?
-
Silicone cupcake liners work best for easy removal. Paper liners also work but may leave slight texture impressions. For larger portions, use small silicone tart molds or shot glasses.
- → How do I prevent the chocolate cups from cracking?
-
Ensure chocolate is properly tempered and coats evenly. Apply two thin layers rather than one thick layer, chilling thoroughly between coats. Handle gently when removing liners.
- → Can these be frozen for later?
-
Freeze assembled cups without fresh toppings for up to 2 weeks. Thaw in refrigerator for 2 hours before serving. Add berries, nuts, and garnishes after thawing.
- → What other toppings work well?
-
Consider crushed cookies, caramel drizzle, coconut flakes, fresh mint leaves, citrus zest, or edible flowers. Seasonal fruits and complementary textures enhance the grazing experience.
