 Save to Pinterest
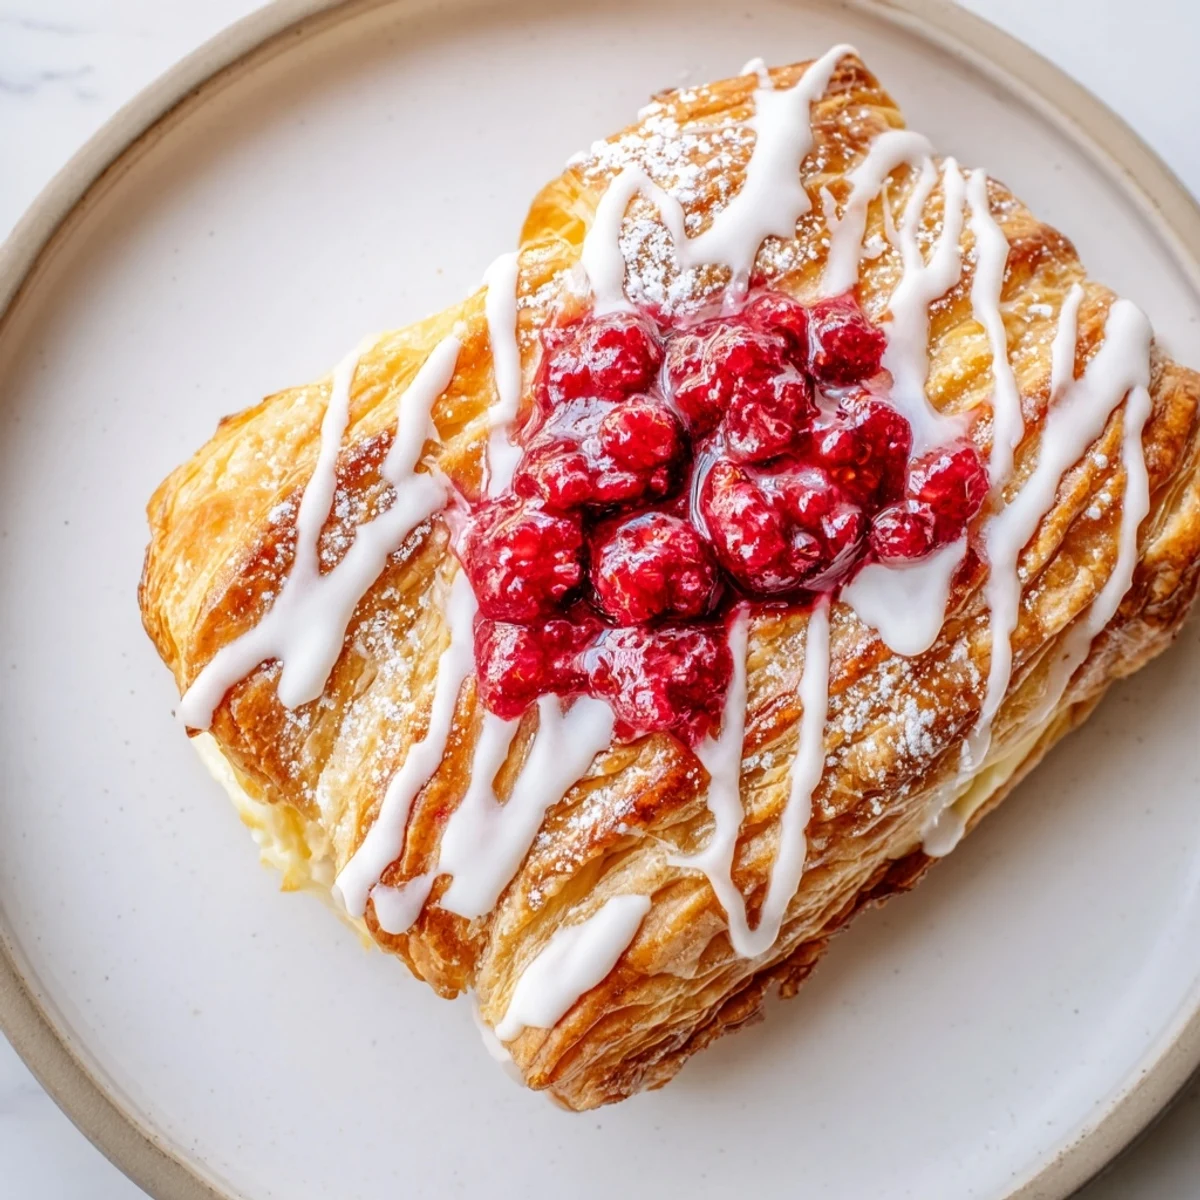
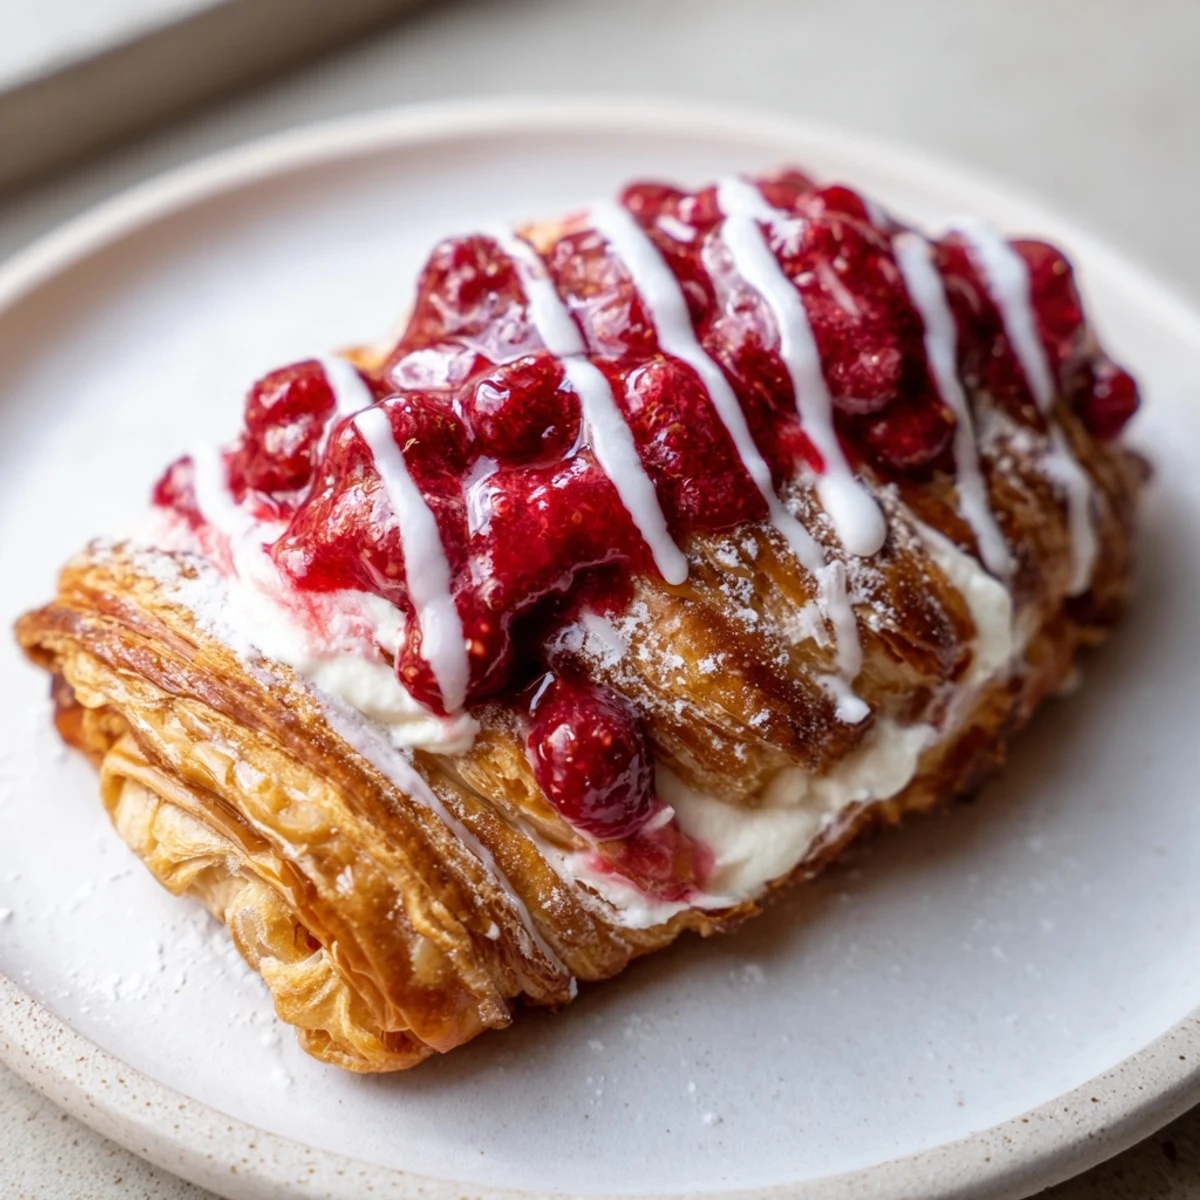
 These tender pastries transform your sourdough discard into buttery, flaky layers filled with a tangy-sweet combination of creamy cheese filling and juicy raspberry compote. The dough comes together quickly with chilled butter, flour, and unfed sourdough starter, requiring just an hour of chilling time. After rolling and cutting, create center wells to hold the fillings—a smooth blend of softened cream cheese with vanilla and lemon, paired with a thickened raspberry sauce.
Bake until golden brown with a glossy egg wash finish, then drizzle with vanilla glaze for extra sweetness. The result is a bakery-quality pastry perfect for weekend brunch, special breakfasts, or afternoon coffee breaks. You can easily customize by swapping fresh berries or adding sliced almonds before baking.
The butter hit the flour like tiny snowflakes scattering across my counter, and I remembered my grandmother saying cold ingredients make the flakiest pastry. She was right about that. These Danishes started as a way to use up my excess sourdough starter, but they have become the pastry I am most proud of.
Last summer I made these for a garden brunch and my friend actually paused mid conversation to ask what she was eating. Watching someone discover that perfect first bite where flaky crust meets tangy filling is just the best feeling in the world.
Ingredients
- Chilled unsalted butter: Cold butter is the secret to flaky layers so keep it icy until the moment it hits the flour
- All purpose flour: Provides structure without overwhelming the delicate sourdough flavor
- Sourdough discard: Adds subtle tang and incredible depth that regular pastry lacks
- Granulated sugar: Just enough to balance the sourdough without making it cloyingly sweet
- Salt: Enhances all the flavors and brings out the butter notes
- Beaten egg: Creates that gorgeous golden shine that makes them look professionally made
- Cream cheese: Must be softened to room temperature for that silky smooth texture
- Vanilla extract: Pure vanilla makes all the difference in the cream cheese filling
- Lemon juice: Brightens both fillings and cuts through the richness
- Fresh raspberries: Frozen works but fresh raspberries burst more beautifully when baked
- Cornstarch: Thickens the raspberry filling just enough so it does not run everywhere
- Powdered sugar: Creates the perfect drizzle consistency without being too thick
- Milk or cream: Adjust to get your glaze exactly how you like it
Instructions
- Prepare the Dough:
- Cut the cold butter into the flour until the mixture resembles coarse crumbs with some pea sized pieces remaining. Mix in the sourdough discard, sugar, and salt until a soft dough forms. Shape dough into a disk, wrap in plastic, and chill for at least 1 hour.
- Make Cream Cheese Filling:
- Beat the softened cream cheese until completely smooth and free of lumps. Add sugar, vanilla, and lemon juice, then mix until creamy and fully combined. Set aside while you prepare the raspberry filling.
- Make Raspberry Filling:
- Combine raspberries, sugar, cornstarch, and lemon juice in a small saucepan. Cook over medium heat, stirring constantly until the mixture thickens and bubbles for about 3 to 5 minutes. Let cool completely before using.
- Assemble Danishes:
- Preheat oven to 375°F and line a baking sheet with parchment paper. Roll out the chilled dough to about 1/4 inch thick and cut into 8 rectangles or circles. Place them 2 inches apart on the baking sheet and create an indentation in the center of each piece. Spoon about 1 tablespoon of cream cheese filling into each center then top with raspberry filling.
- Proof and Bake:
- Let the assembled pastries rest at room temperature for 20 to 30 minutes so they puff slightly. Brush edges lightly with beaten egg for that professional shine. Bake for 20 to 25 minutes until golden brown and set, then cool on a rack.
- Add Glaze:
- Whisk powdered sugar, milk, and vanilla until completely smooth. Drizzle generously over cooled Danishes just before serving.
 Save to Pinterest
 These have become my go to for holiday mornings. There is something about the smell of them baking that makes everyone gather in the kitchen and that is exactly how I like to start any special day.
Making Them Ahead
I have learned through many late night baking sessions that you can prepare both fillings the day before and store them in the refrigerator. The dough also freezes beautifully if you want to get a head start on weekend baking.
Fruit Variations
Blueberries work wonderfully in these and actually hold their shape even better than raspberries. Strawberries need to be chopped small or they release too much liquid but the flavor is absolutely worth the extra prep time.
Getting The Perfect Shape
Squares are easier than circles and actually hold more filling without spilling over. Do not worry about making them perfect because the rustic look is part of their charm.
- Use a pizza cutter for the cleanest edges
- Chill the cut shapes again before filling if the dough feels soft
- Leave at least an inch border around the edges for the prettiest presentation
 Save to Pinterest
 There is nothing quite like pulling a tray of these from the oven and seeing everyone is face light up. Happy baking and enjoy every single buttery tangy sweet bite.
Your Recipe Questions
- → Can I make these ahead of time?
-
Yes, prepare the dough and fillings up to 24 hours in advance. Store dough wrapped in the refrigerator and keep fillings in separate airtight containers. Assemble and bake when ready to serve for the freshest results.
- → What if I don't have sourdough discard?
-
You can substitute with an equal amount of active sourdough starter, though the flavor will be more tangy. Alternatively, use additional flour and a splash of milk or water to achieve similar dough consistency, though you'll miss the characteristic sourdough depth.
- → Can I use frozen raspberries instead of fresh?
-
Absolutely. Frozen raspberries work perfectly for the filling since they'll be cooked down with sugar and cornstarch. No need to thaw first—just add them directly to the saucepan. You may need to cook 1-2 minutes longer to reach the desired thickness.
- → How do I store leftover danishes?
-
Store cooled danishes in an airtight container at room temperature for up to 2 days. For longer storage, freeze individually wrapped pastries for up to 3 months. Reheat in a 350°F oven for 5-7 minutes to refresh the flaky texture.
- → Why did my dough shrink while rolling?
-
Dough shrinkage happens when the butter warms up too much. Keep your work surface lightly floured, work quickly, and return the dough to the refrigerator if it becomes soft or sticky. Chilling for at least an hour before rolling is essential for proper laminated pastry texture.
- → Can I make these gluten-free?
-
While challenging due to the structural importance of gluten in laminated dough, you could try a 1:1 gluten-free flour blend meant for baking. The texture will be more cake-like than flaky, and you may need to adjust liquid amounts. Results will vary from traditional Danish pastry.
