 Save to Pinterest
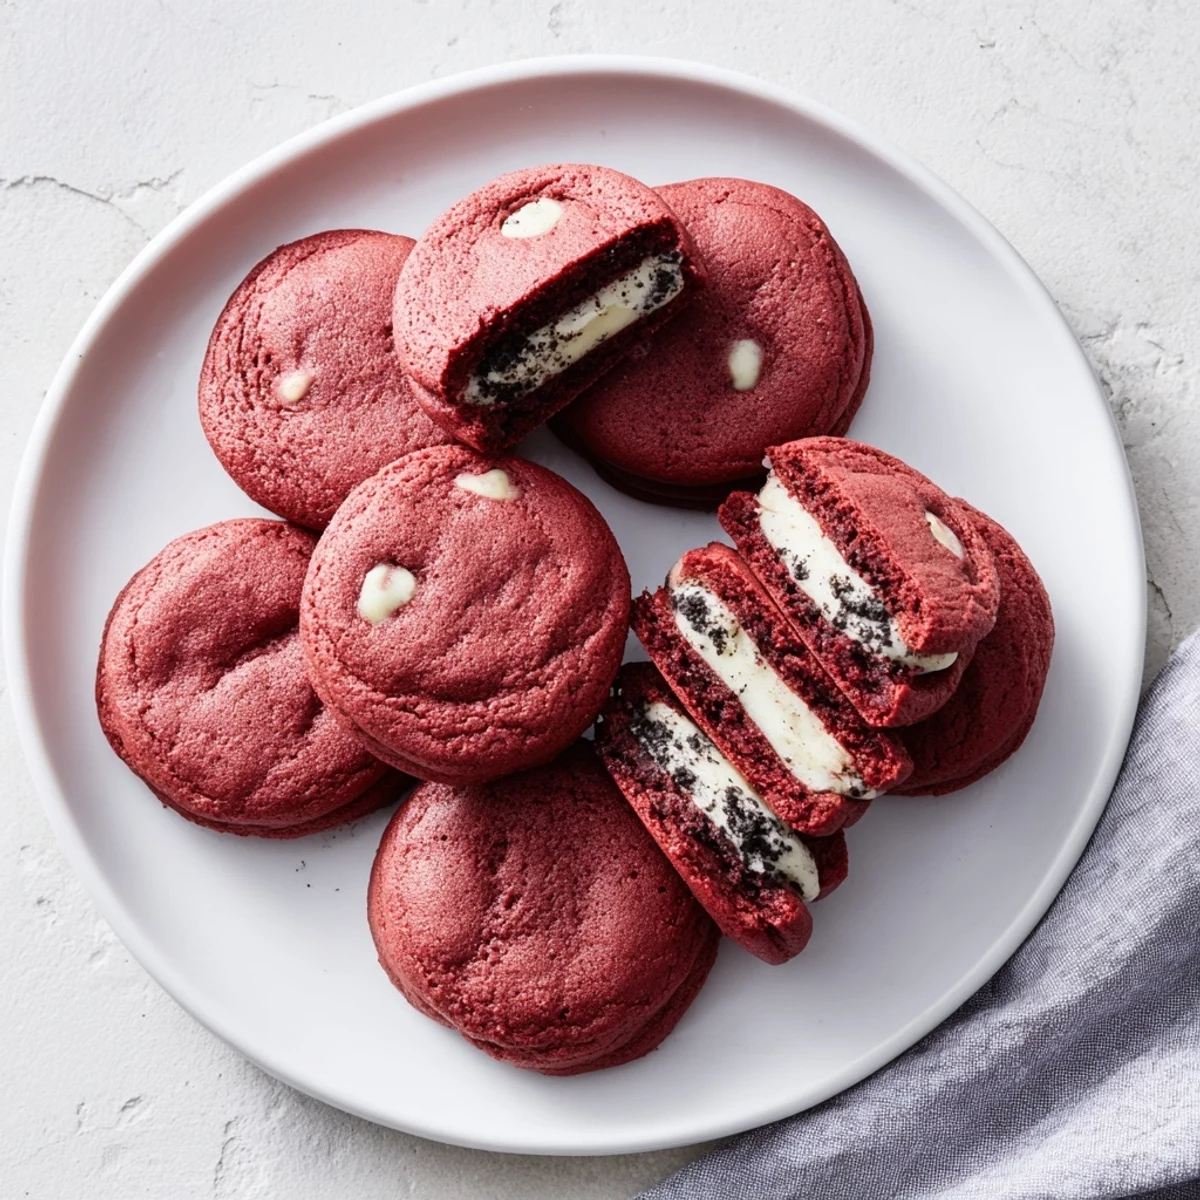
 These stuffed cookies combine the classic appeal of red velvet with the irresistible crunch of Oreos. The vibrant red dough gets its color and subtle chocolate flavor from cocoa powder, while white chocolate chips add sweetness throughout. Inside each cookie lies a creamy filling made from cream cheese, butter, and crushed Oreo cookies that creates a surprise center.
The 37-minute process includes 25 minutes of prep and 12 minutes of baking. Chilling the Oreo cream filling before stuffing makes assembly easier and prevents leakage during baking. The result is 16 soft, chewy cookies with crisp edges and a molten cream center.
Store in an airtight container for up to three days, though they rarely last that long. For added texture, roll the dough balls in extra crushed Oreos before baking.
The first time my roommate caught me hovering over the oven at 2am, watching these ruby-red cookies rise, she asked what on earth I was making. I explained that I'd had this sudden obsession with combining red velvet cake flavors with Oreos, and couldn't wait until morning to test the theory. When she tried one fresh from the cooling rack the next day, she understood completely. Now they're the most requested item at every gathering.
Last Valentine's Day, I made a double batch for my partner's office party and came home to find him hiding the last four cookies in a Tupperware container behind his back. His coworkers had apparently devoured the rest within fifteen minutes, and he was saving his personal stash for later. The best part was reading all the text messages asking if I'd consider selling them.
Ingredients
- 2 cups all-purpose flour: The foundation that gives these cookies their perfect chewy structure and holds all that filling inside
- 1/4 cup unsweetened cocoa powder: Essential for that signature red velvet depth and gorgeous maroon color
- 1 tsp baking soda: Helps the cookies spread just right while keeping centers tender
- 1/2 tsp salt: Balances the sweetness and enhances the cocoa flavor
- 1/2 cup unsalted butter, softened: Room temperature butter creates that melt-in-your-mouth texture we're chasing
- 3/4 cup granulated sugar and 1/2 cup light brown sugar: The combination gives crackly edges and chewy centers
- 1 large egg: Binds everything together and adds richness
- 1 tbsp milk: Just enough liquid to bring the dough together without making it sticky
- 2 tsp vanilla extract: Don't skimp here, it's the aromatic backbone of the whole cookie
- 1 tbsp red food coloring: Gel coloring gives the most vibrant red without thinning the dough
- 1 cup white chocolate chips: Creamy pockets that complement the Oreo filling perfectly
- 4 oz cream cheese, softened: The tangy base for the Oreo cream filling
- 2 tbsp unsalted butter, softened: Makes the filling smooth and pipeable
- 1 1/4 cups powdered sugar, sifted: Sweetens and stabilizes the creamy filling
- 1/2 tsp vanilla extract: Rounds out the filling flavor
- 8 Oreo cookies, finely crushed: The surprise element that makes these cookies unforgettable
Instructions
- Preheat and prepare:
- Heat your oven to 350°F and line two baking sheets with parchment paper, setting everything up before you start mixing.
- Whisk the dry ingredients:
- In a medium bowl, combine flour, cocoa powder, baking soda, and salt until well blended, then set it aside.
- Cream the butter and sugars:
- Beat the softened butter with both sugars until the mixture is light and fluffy, about 2-3 minutes.
- Add wet ingredients:
- Mix in the egg, milk, vanilla, and red food coloring until the dough turns a uniform vibrant red.
- Combine everything:
- Gradually add the dry ingredients to the wet mixture, mixing just until combined, then fold in those white chocolate chips.
- Make the Oreo filling:
- In another bowl, beat the cream cheese and butter until smooth, then add powdered sugar and vanilla until creamy before folding in crushed Oreos and refrigerating for 10 minutes.
- Stuff the cookies:
- Scoop 2-tablespoon portions of dough, flatten them slightly, place a rounded teaspoon of chilled filling in the center, and carefully fold the dough around to seal it completely.
- Bake to perfection:
- Place the stuffed dough balls 2 inches apart on your prepared sheets and bake for 11-12 minutes until edges are set but centers still look soft.
- Cool carefully:
- Let the cookies rest on the baking sheet for 5 minutes before transferring them to a wire rack to cool completely.
 Save to Pinterest
 My niece helped me make these last Christmas and discovered that if you press an extra Oreo half into the top before baking, it creates this gorgeous cookie sandwich effect. She was so proud of her invention that she insisted on telling everyone at our family gathering that she was now a professional recipe developer. The joy on her face when everyone loved her version was absolutely priceless.
Getting That Perfect Red Color
After years of making red velvet treats, I've learned that gel food coloring is absolutely worth the extra trip to the craft store. Liquid coloring can make your dough sticky and you'll need twice as much to achieve that deep jewel tone. Start with less than you think you need, you can always add more but you can't take it back once the dough turns pink instead of red.
Working with Stuffed Cookies
The trickiest part of this recipe is definitely sealing the dough around the filling without squishing it. I keep a small bowl of water nearby and dampen my fingers slightly when the edges won't stick together. Also, don't worry if some of the white chips or Oreo pieces peek through the dough, they'll actually look beautiful and rustic after baking.
Make-Ahead Magic
You can prepare the stuffed dough balls and freeze them raw on a baking sheet, then transfer to a storage bag once firm. Bake them straight from frozen, adding just 1-2 minutes to the baking time. I also sometimes make just the filling and keep it in the fridge for up to a week, using it to sandwich between plain sugar cookies in a pinch.
- Scoop any leftover filling into a small container and freeze it for your next batch
- These cookies actually taste even better on day two when the flavors have melded together
- If you're taking these to a party, bring the recipe printed out because people will beg for it
 Save to Pinterest
 There's something deeply satisfying about biting into a warm red velvet cookie and discovering that creamy Oreo center waiting inside. Hope these bring as much joy to your kitchen as they've brought to mine.
Your Recipe Questions
- → How do I prevent the Oreo filling from leaking during baking?
-
Chill the prepared Oreo cream filling for at least 10 minutes before stuffing the dough. This firms up the mixture, making it easier to enclose and preventing it from melting out during baking. Also ensure you seal the dough edges tightly around the filling.
- → Can I make the dough ahead of time?
-
Yes, you can prepare the cookie dough and Oreo filling separately up to 24 hours in advance. Store both in the refrigerator, then bring to room temperature for 10-15 minutes before assembling and baking. The dough may need slightly longer baking time if chilled.
- → What's the best way to crush the Oreos for the filling?
-
Place the Oreo cookies in a sealed plastic bag and crush them with a rolling pin or meat mallet until you achieve fine crumbs. Alternatively, pulse them in a food processor for 5-10 seconds. Avoid over-crushing into a powder; small pieces provide better texture.
- → Can I use liquid or gel food coloring?
-
Both liquid and gel food coloring work well in this dough. Gel coloring produces a more vibrant red shade with less liquid, which can slightly affect dough consistency. If using liquid, you may need to add a teaspoon more flour to maintain the proper dough texture.
- → How do I know when the cookies are done baking?
-
The cookies are ready when the edges appear set and slightly firm, while the centers still look soft and underbaked. This usually takes 11-12 minutes at 350°F. The centers will continue cooking as they cool on the baking sheet, resulting in perfectly chewy cookies.
- → Can I freeze these stuffed cookies?
-
You can freeze the assembled but unbaked cookie dough balls on a baking sheet until firm, then transfer to a freezer bag for up to 3 months. Bake from frozen, adding 2-3 extra minutes to the baking time. Already baked cookies can be frozen for up to 2 months.
