 Save to Pinterest
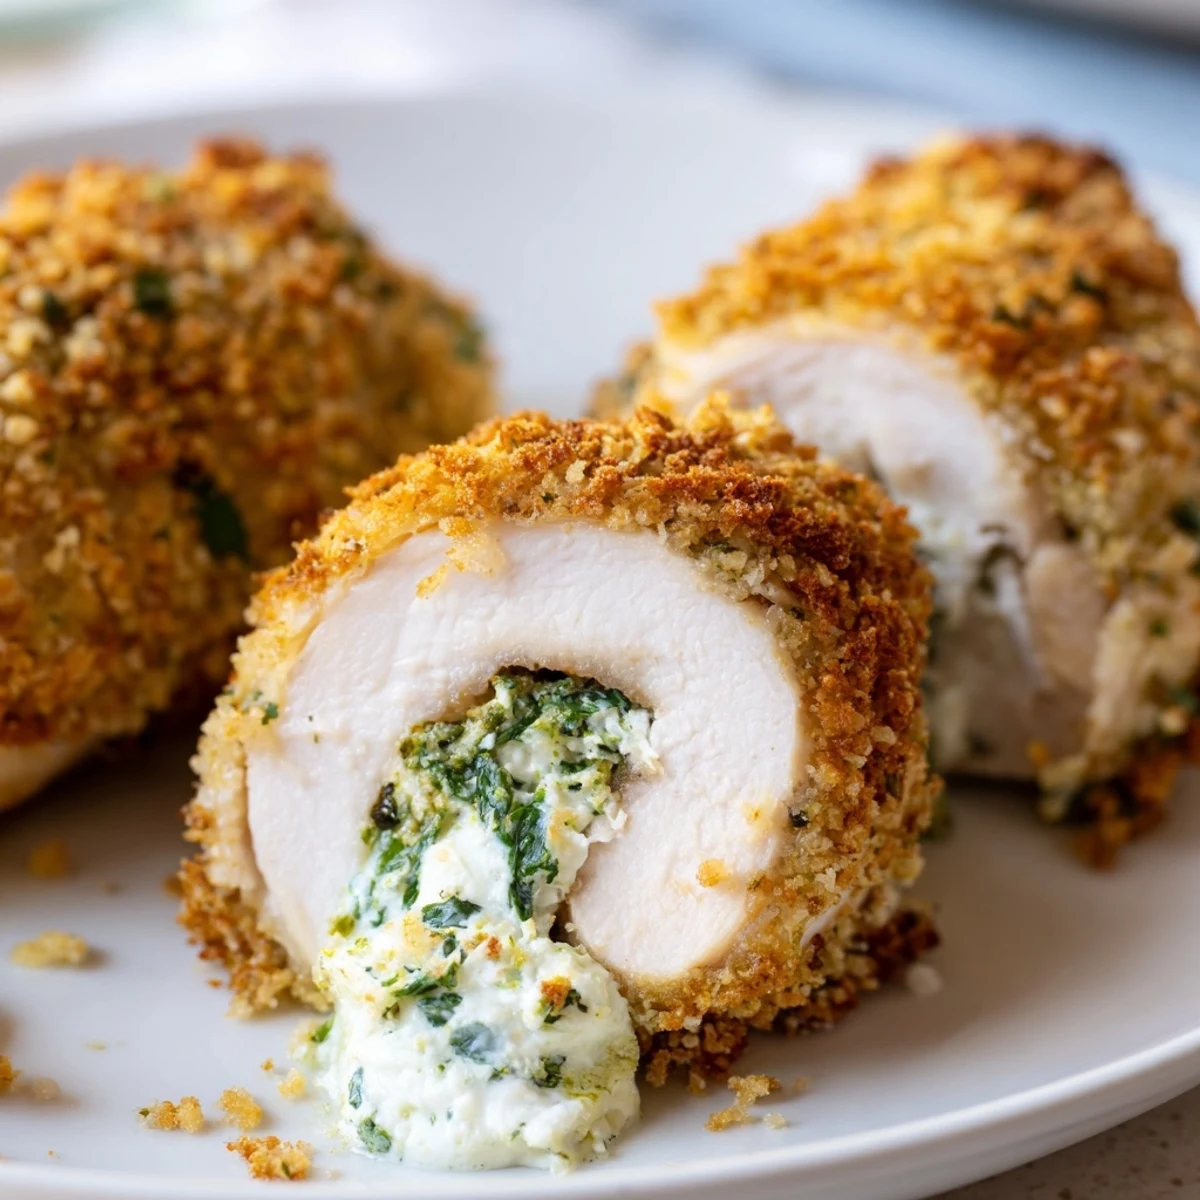
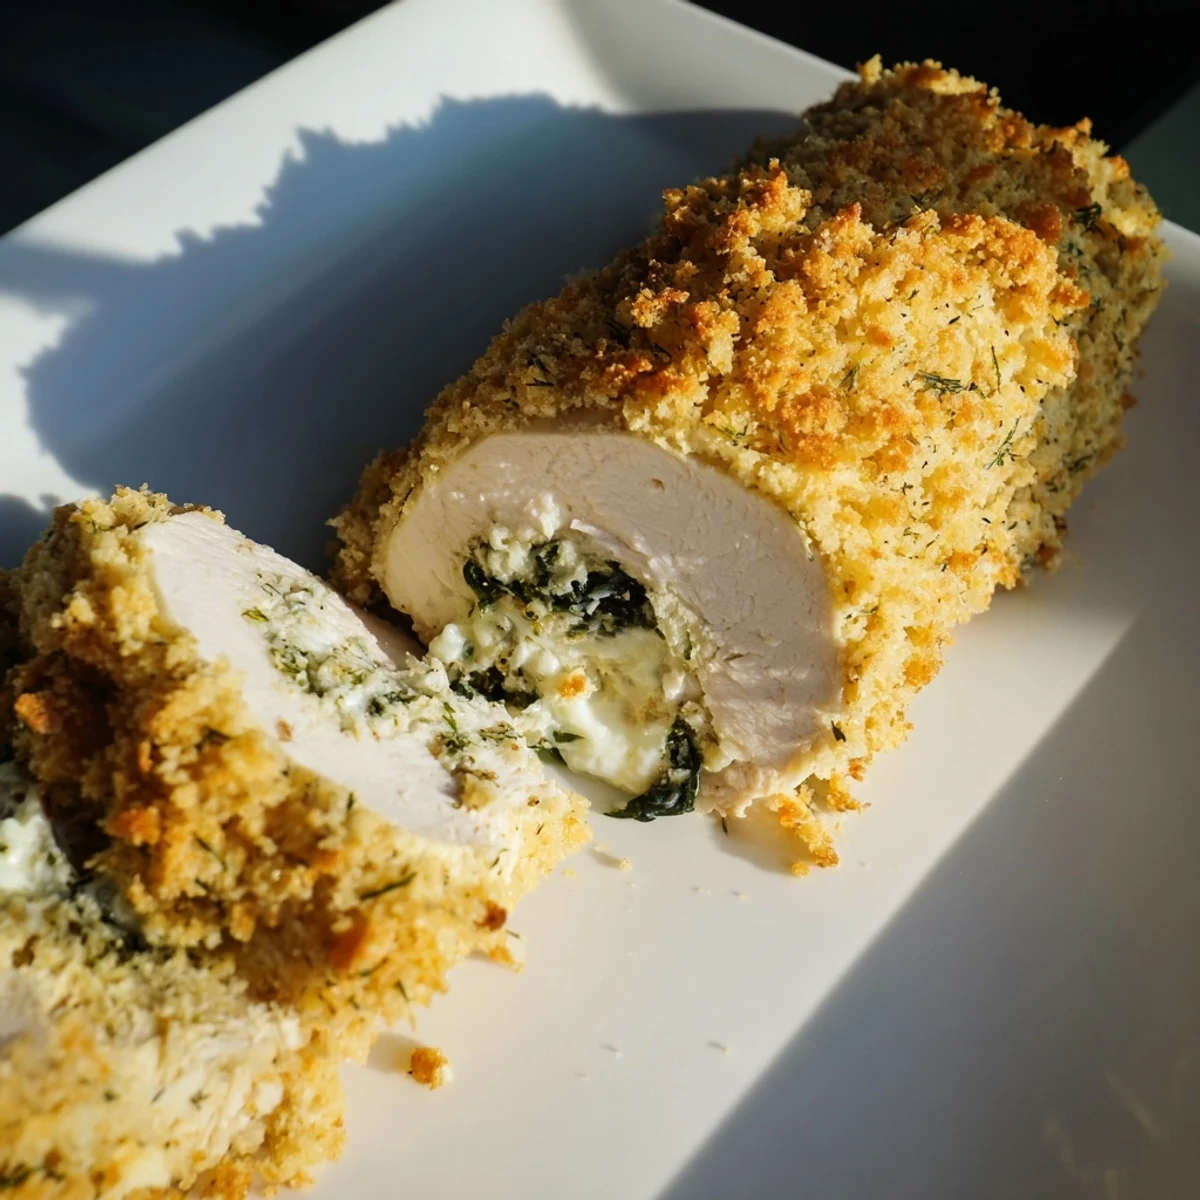
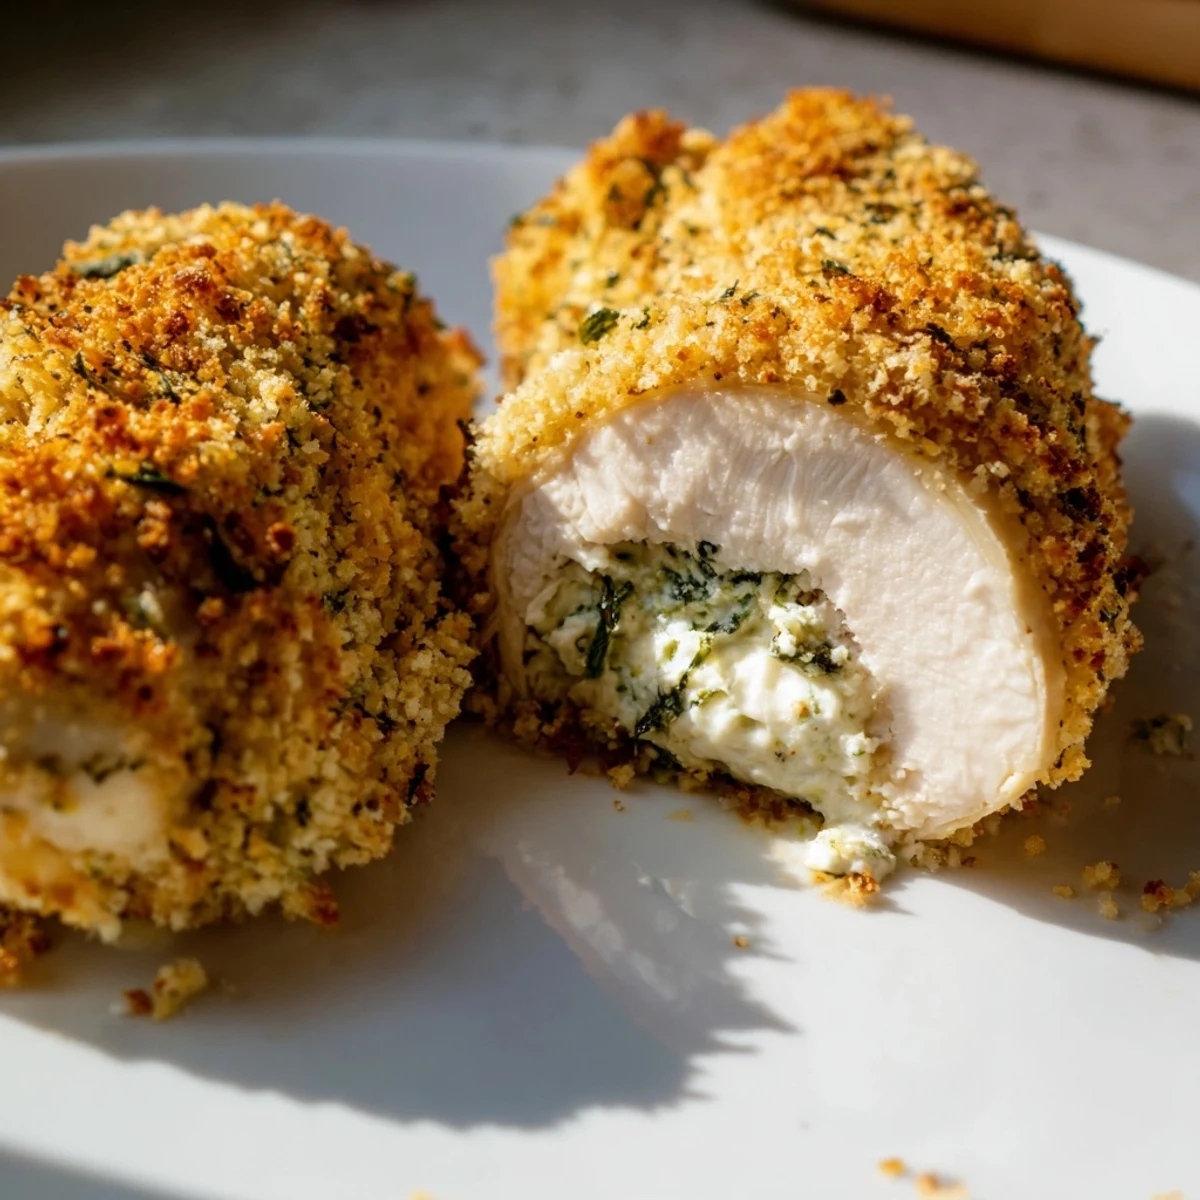
 These elegant chicken rolls feature tender breasts pounded thin and wrapped around a creamy, herb-infused ricotta filling. Fresh parsley, basil, and thyme brighten the rich cheese mixture, while a crispy parmesan-breadcrumb topping adds satisfying crunch.
The preparation involves pounding the chicken to even thickness, spreading the zesty ricotta blend, rolling tightly, and coating with seasoned breadcrumbs. After baking at high heat, you get juicy, flavorful chicken with a golden crust that looks impressive on the plate.
Perfect for entertaining yet simple enough for weeknight dinners, this Italian-inspired main pairs beautifully with roasted vegetables, fresh salad, or pasta. The high protein content makes it satisfying without being heavy, while the gluten-free adaptation keeps it accessible for various dietary needs.
The first time I made these stuffed chicken rolls, I was trying to impress dinner guests with something that looked fancy but was secretly forgiving. I ended up eating one straight off the baking sheet while plating everything else, burning my fingers but not caring one bit. That crispy, herbed topping had me completely hooked. Now it's become my go-to when I want food that feels special without the stress.
Last winter my sister came over exhausted from work, and I made these while she sat at the counter telling me about her day. The smell of garlic and herbs hitting the warm ricotta made the whole kitchen feel cozy. She took one bite and actually went quiet for a full minute. That's when I knew this recipe was a keeper for more than just dinner parties.
Ingredients
- 4 boneless skinless chicken breasts: Pounding them thin makes all the difference between dry and juicy, so dont skip this step
- Salt and pepper: Season generously before rolling since youre building flavor in layers
- 1 tablespoon olive oil: Just enough to help the breadcrumbs turn golden and crispy
- 1 cup ricotta cheese: Whole milk ricotta gives you the creamiest filling, but part skim works too
- 1/4 cup grated Parmesan cheese: Adds a salty umami punch that cuts through the mild ricotta
- 2 tablespoons chopped fresh parsley: Bright, fresh flavor that makes the filling taste vibrant
- 1 tablespoon chopped fresh basil: Sweet, peppery notes that pair beautifully with the garlic
- 1 teaspoon chopped fresh thyme: Earthy and aromatic, dried thyme works if fresh isnt available
- 1 garlic clove minced: Fresh garlic is non negotiable here for that punchy aromatic flavor
- 1/2 teaspoon lemon zest: A secret weapon that brightens the entire filling without making it acidic
- 1/2 cup breadcrumbs: Gluten free works perfectly if you need it to be
- 2 tablespoons grated Parmesan cheese: Mixed into the breadcrumbs for extra salty crunch
- 1 tablespoon olive oil: Tossed with the breadcrumbs to help them brown beautifully
Instructions
- Get your oven ready:
- Preheat to 400°F and line a baking sheet with parchment paper for easy cleanup later
- Pound the chicken:
- Place each breast between plastic wrap and pound to an even 1/4 inch thickness, working from the center outward
- Season the chicken:
- Sprinkle both sides generously with salt and pepper, treating it like youre building flavor from the ground up
- Make the filling:
- Mix the ricotta, Parmesan, parsley, basil, thyme, garlic, lemon zest, salt, and pepper until completely combined
- Fill and roll:
- Spread the ricotta mixture over each chicken breast and roll tightly from the short end, securing with toothpicks if needed
- Prep the topping:
- Combine the breadcrumbs with Parmesan and olive oil until the mixture looks like wet sand
- Top and bake:
- Place rolls seam side down on the baking sheet, press the breadcrumb mixture on top, and bake for 28 to 32 minutes until golden and cooked through
- Rest before serving:
- Let the chicken rest for 5 minutes so the juices redistribute and the filling sets slightly
 Save to Pinterest
 These became my daughters most requested birthday dinner, and shes not usually one to choose anything besides pizza. Watching her carefully cut into the roll and exclaim over the cheesy filling inside makes the little extra effort worth it every single time.
Make It Your Own
I've experimented with adding chopped spinach to the ricotta mixture for color and extra nutrition. Sun dried tomatoes also work beautifully if you want something with a more intense, savory flavor profile. Sometimes I'll add a pinch of red pepper flakes if I'm craving a little heat.
What To Serve With It
A crisp green salad with a bright vinaigrette cuts through the richness perfectly. Roasted vegetables like asparagus or zucchini cook alongside the chicken at the same temperature. On special occasions I'll make a simple pasta aglio e olio to turn it into a more elaborate Italian inspired meal.
Make Ahead And Storage
You can assemble the rolls up to a day ahead and keep them wrapped tightly in the refrigerator. The breadcrumb topping gets a bit soggy overnight, so add that right before baking. Leftovers reheat surprisingly well in a 350°F oven for about 15 minutes.
- Freeze uncooked rolls individually wrapped for up to 3 months
- Bake from frozen adding about 10 extra minutes to the cooking time
- The filling can be made 2 days ahead and kept refrigerated
 Save to Pinterest
 Theres something so satisfying about slicing into these and seeing that beautiful spiral of chicken and herbed cheese. It's the kind of meal that makes people feel taken care of, and really isnt that the whole point of cooking for people you love?
Your Recipe Questions
- → How do I pound chicken breasts evenly?
-
Place chicken between two sheets of plastic wrap or parchment paper. Using a meat mallet or rolling pin, pound from the center outward until you reach an even 1/4-inch thickness. This ensures consistent cooking and makes rolling easier.
- → Can I prepare these ahead of time?
-
Yes! Assemble the rolls completely, cover tightly, and refrigerate for up to 24 hours before baking. Add the breadcrumb coating just before baking to maintain its crisp texture. You may need to add 2-3 minutes to the cooking time if baking from cold.
- → What can I use instead of toothpicks?
-
If you don't have toothpicks, kitchen twine works well to secure the rolls. Alternatively, place the rolls seam-side down on the baking sheet—the weight of the chicken plus the breadcrumb topping typically keeps them closed during baking.
- → How do I know when the chicken is fully cooked?
-
Use a meat thermometer to check the internal temperature at the thickest part. It should read 165°F (74°C). Visual cues include golden-brown breadcrumb topping and juices that run clear when pierced. Letting the meat rest for 5 minutes helps retain moisture.
- → What sides pair well with this dish?
-
Light, fresh sides balance the rich filling beautifully. Try arugula salad with lemon vinaigrette, roasted asparagus or zucchini, garlic mashed cauliflower, or simple angel hair pasta with olive oil and parmesan. A crisp white wine like Pinot Grigio complements the flavors perfectly.
- → Can I freeze the assembled rolls?
-
Absolutely! Prepare the rolls completely through step 7, wrap individually in plastic, then freeze in a sealed container for up to 3 months. Thaw overnight in the refrigerator, add the breadcrumb topping, and bake as directed. Add 5-10 minutes to the baking time if baking from partially frozen.
