 Save to Pinterest
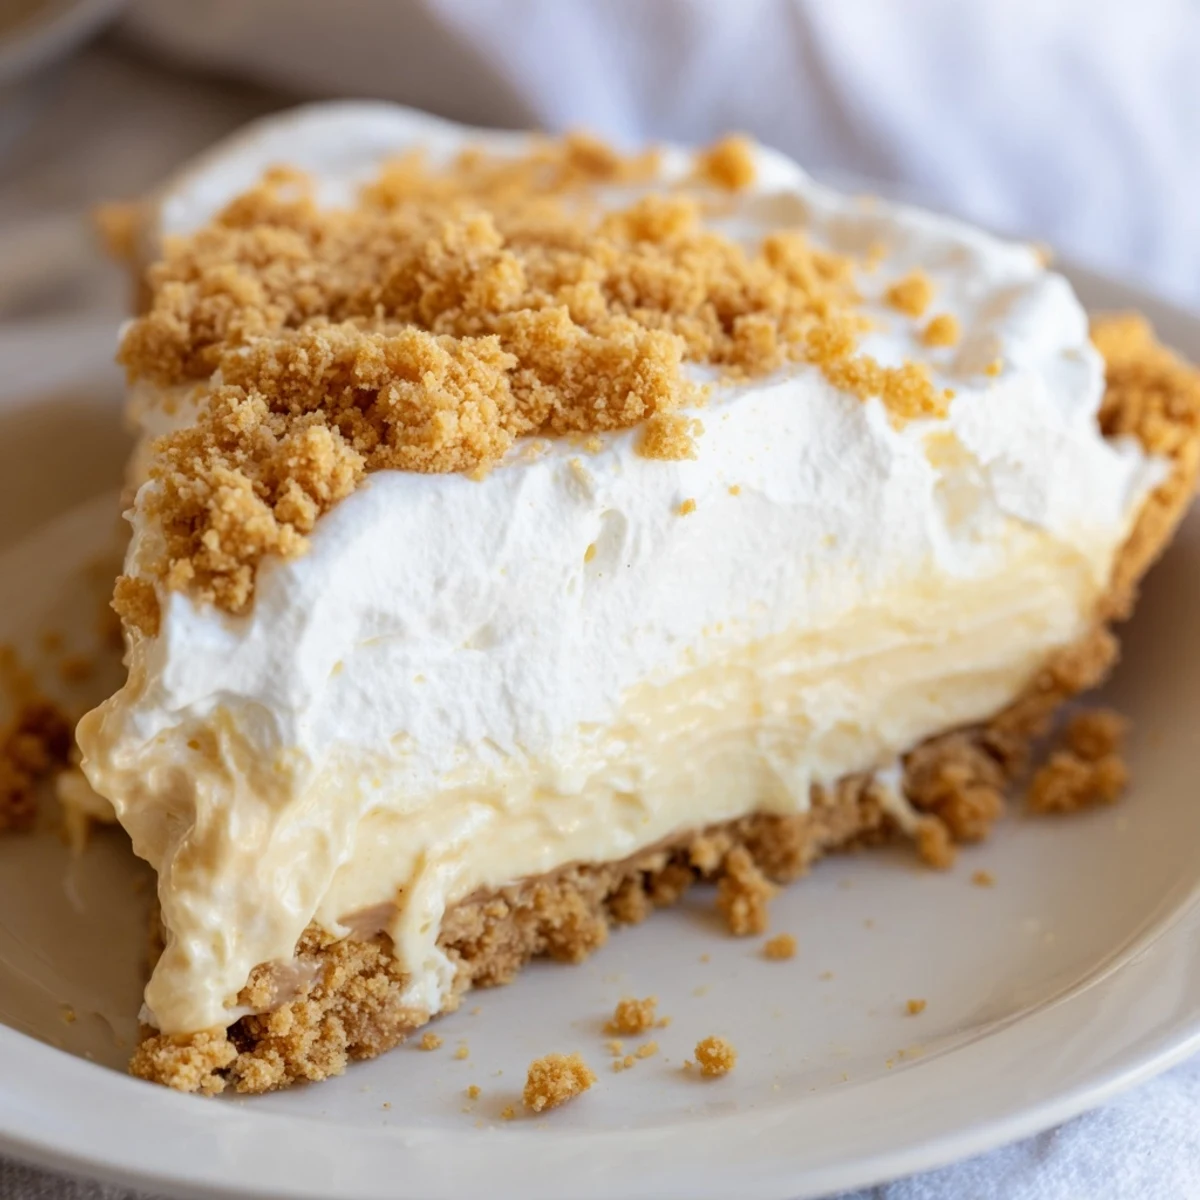
 This old-fashioned Amish peanut butter dream pie combines rich, creamy peanut butter filling with a classic American dessert tradition. The velvety custard-based filling sits atop a layer of sweet peanut butter crumbs, all nestled in a crisp pie shell. Topped with freshly whipped cream and sprinkled with additional crumbs, this comforting dessert delivers the perfect balance of sweet and nutty flavors. The straightforward method involves cooking a stovetop custard, tempering egg yolks for a silky smooth texture, and allowing ample chilling time for the filling to set properly. Perfect for gatherings, potlucks, or whenever nostalgia strikes.
The first time I encountered this pie at an Amish roadside stand in Lancaster County, I couldn't believe something so simple could taste so extraordinary. The woman behind the counter just smiled and said 'it's just peanut butter and patience' when I asked for the recipe. That rainy afternoon, my grandmother and I shared two slices at a small wooden table, watching horse-drawn buggies pass by while the rain drummed against the windows. That moment of pure comfort stuck with me for years before I finally learned to recreate it myself.
I brought this pie to my friend Sarah's birthday potluck last summer, and her father who rarely eats dessert went back for a third slice. He told me it reminded him of his grandmother's kitchen in the 1950s, which is exactly the kind of memory food should trigger. Now Sarah requests it for every occasion, and I've learned to double the peanut butter crumble portion because that's everyone's favorite part.
Ingredients
- 1 9-inch prepared pie crust: Using a pre-baked crust saves time but if you want extra comfort, a homemade graham cracker crust adds wonderful texture and flavor
- 3/4 cup creamy peanut butter: I've learned that the natural style peanut butter with oil on top doesn't work as well here, you need the commercial creamy variety for the right crumble consistency
- 1 cup powdered sugar: This creates that signature sandy texture in the peanut butter crumbs, so don't substitute with granulated sugar
- 2/3 cup granulated sugar: The filling needs this amount to achieve the perfect sweetness without overpowering the peanut butter flavor
- 1/3 cup all-purpose flour: This is the thickening agent that transforms the milk mixture into a silky pudding-like consistency
- 1/4 teaspoon salt: Just enough to enhance all the flavors without making it taste salty
- 2 cups whole milk: I tried using low-fat milk once and the filling never achieved the right richness or thickness
- 3 large egg yolks: These create the luxurious custard base and give the filling its beautiful golden color
- 1 teaspoon pure vanilla extract: Always use pure vanilla here, it makes a noticeable difference in the final flavor
- 2 tablespoons unsalted butter: This adds the final silky finish to the filling and helps it set up perfectly
- 1 cup heavy whipping cream: Cold from the refrigerator is essential for achieving those stiff peaks
- 2 tablespoons powdered sugar: Just enough sweetness to balance the tang of the whipped cream
- 1/2 teaspoon vanilla extract: This little bit of vanilla in the topping ties everything together beautifully
Instructions
- Making the peanut butter crumbs:
- In a medium bowl, use a fork to mash the peanut butter and powdered sugar together until it resembles damp sand and no large peanut butter chunks remain
- Preparing the crust:
- Press half of your peanut butter crumbs evenly into the bottom of your baked and cooled pie crust, reserving the rest for the topping
- Starting the filling base:
- Whisk together the granulated sugar, flour, and salt in a medium saucepan until well combined, then gradually whisk in the milk until completely smooth
- Cooking the filling:
- Place the saucepan over medium heat and whisk constantly until the mixture thickens enough to coat the back of a spoon and just begins to bubble, about 4 to 5 minutes
- Tempering the eggs:
- Whisk your egg yolks in a separate bowl, then slowly whisk in about half a cup of the hot milk mixture to warm the eggs gently without scrambling them
- Combining and thickening:
- Pour the warmed egg mixture back into the saucepan while whisking constantly, then continue cooking for another 2 minutes until the filling is very thick and glossy
- Finishing the filling:
- Remove from heat and stir in the butter and vanilla until smooth and completely incorporated
- Assembling the pie:
- Pour the warm filling over the peanut butter crumbs in your crust and let it cool for about 15 minutes before refrigerating for at least 2 hours until completely set
- Preparing the topping:
- Beat the heavy cream, powdered sugar, and vanilla with an electric mixer until stiff peaks form, being careful not to overbeat
- Final touches:
- Spread the whipped cream over your completely chilled pie and sprinkle with the remaining peanut butter crumbs just before serving
 Save to Pinterest
 My daughter requested this pie for her eighth birthday instead of a cake, and watching her carefully scrape every crumb from her plate made me realize how special simple desserts can be. Her little brother asked if he could have just the peanut butter crumble part for his birthday next year, which tells you everything about which part kids love most.
Make Ahead Magic
This pie actually tastes better when made a day ahead, giving all the flavors time to meld together into something extraordinary. I've made it the night before every Thanksgiving for the past five years, and it's always the first dessert to disappear while people are still chatting about how they're too full for dessert.
Serving Suggestions
A small drizzle of warm chocolate sauce over each slice takes this from wonderful to absolutely unforgettable, especially for chocolate lovers. I've also served it with fresh raspberries on the side, and the tart fruit cuts through the richness perfectly.
Storage Secrets
This pie keeps beautifully in the refrigerator for up to three days, though the peanut butter crumbs will gradually soften on top. I've learned to press a piece of plastic wrap directly against the whipped cream before storing, which keeps it fresh and prevents any fridge flavors from absorbing.
- Let refrigerated pie sit at room temperature for about 15 minutes before serving for the best texture and flavor
- If you need to transport this pie, keep it very cold and place it on a flat surface to prevent the whipped cream from sliding
- The peanut butter crumble can be made several days ahead and stored in an airtight container at room temperature
 Save to Pinterest
 There's something profoundly satisfying about serving a dessert that makes people pause mid-conversation to fully appreciate what they're experiencing. This pie has that magical quality of turning an ordinary Tuesday dinner into something worth celebrating.
Your Recipe Questions
- → How long should the pie chill before serving?
-
Refrigerate the pie for at least 2 hours until completely set. For best results, chill 3-4 hours to ensure the filling is firm enough to hold clean slices when serving.
- → Can I use crunchy peanut butter instead of creamy?
-
While creamy peanut butter creates the traditional smooth texture, you can substitute crunchy peanut butter if you prefer extra texture. The crumbs may have a slightly different consistency but will still be delicious.
- → What type of crust works best?
-
A standard 9-inch baked pie crust works perfectly. For extra flavor, try a homemade graham cracker crust or shortbread crust. Just ensure it's fully baked and cooled before adding the filling.
- → How should I store leftovers?
-
Store the pie in the refrigerator, covered loosely with plastic wrap or aluminum foil. It will keep well for 3-4 days. The whipped cream topping may soften slightly but remains tasty.
- → Can I make this pie ahead of time?
-
Yes, this pie actually improves after chilling overnight. Prepare it up to 24 hours in advance, but add the final sprinkle of peanut butter crumbs shortly before serving to maintain their texture.
- → Why do I need to temper the egg yolks?
-
Tempering prevents the eggs from scrambling when added to the hot milk mixture. Gradually whisking in small amounts of hot liquid raises the egg temperature slowly, creating a smooth, glossy custard.
